Microswitch Repair
Why?
Why repair a microswitch (a.k.a. “basic switch” or even “snap switch”) when they are inexpensive and readily available? Several reasons come to mind:
- Some microswitch variants are “special”, with rare or unique specifications. They may not be readily available, or available at all!
- Some “special” microswitches are far from inexpensive.
- Repairing a microswitch vs. buying a new one reduces waste.
- You can legitimately use the phrase “Going all Cuban”[1]. As in “I went all Cuban on that microswitch, and repaired it”.
- It can be a fun and rewarding experience!
How?
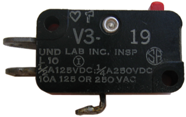
This case study covers the Honeywell Micro Switch® brand model V3-2414-D9 microswitch. In late December 2008, there was no reasonably available substitute for this switch, which was needed to repair a home heating furnace. The techniques described and shown here should apply to most or all V3 Micro Switch®es directly, and should be useful guides for other makes and models.
Step 1: Open Up the Switch
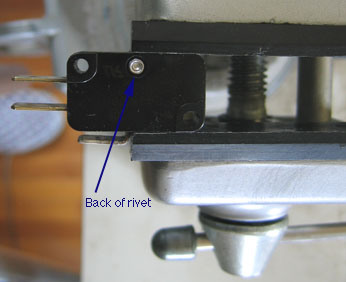
Careful study of the construction details of the microswitch will likely be needed. Micro Switch® brand standard-size switches like the V3 and V7 (and other) series are held together by one rivet. Drilling the back end crimp off the rivet (a standard technique for removal of this sort of rivet) will allow the rivet to be removed:
On most designs, the switch “half” on the side with the rivet head(s)(opposite the side drilled out, and usually with the electrical specifications) is far less than half the thickness. Lift this section straight off, and one should see something like this:
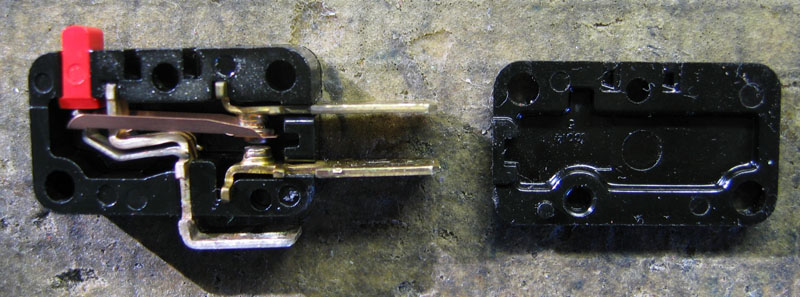
In the Micro Switch® V3 design, nothing “boinks out”: every part of the switch mechanism is visible and stays in place. Nevertheless, the parts can fall out, so care is required.
Step 2: Clean the Contacts
- Pull out the normally open contact/connector.
- Activate the switch to remove contact pressure, then pull out the normally closed contact/connector.
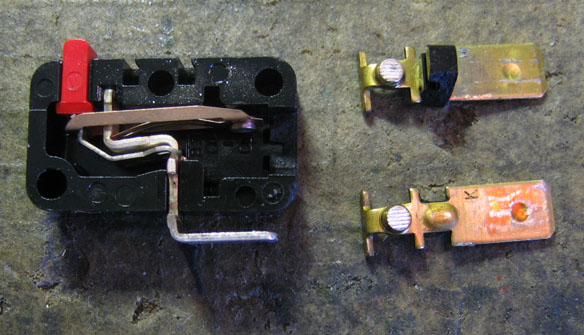
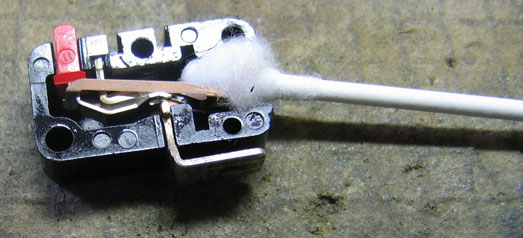
- Clean each contact surface with your preferred cleaner[2] and method. The wiper contacts may stay in the switch and be cleaned there:
Reassemble the Switch
Replace the contacts in the reverse order of removal (step b then step a), then reassemble the cover. Rather than even thinking of re-riveting, i prefer to use a small machine screw, lockwasher, and nut. U.S. #2 size or metric 2mm size hardware should work.
Test the Switch
It would be a good idea to put your ohmmeter (or equivalent) on the switch and test each set of contacts before returning the switch to service, to ensure that the cleaning job was successful. Tap the switch: the resistance reading should change little, if at all. Wild jumping with or without tapping indicates more cleaning is needed. With the ohmmeter connected, very slowly and gradually move the actuation button/lever/device: the resistance should be fairly consistent until the “click” (or silent switch throw, for some microswitches), although it is virtually guaranteed that there will be some measurable changes. Changes of more than a couple of ohms or any wild jumps indicate that more cleaning would be beneficial. Be sure to test both NO and NC contact sets, when applicable.
Congratulations!
(Hopefully) You did it! You (may) have successfully disassembled, cleaned, and reassembled a microswitch! Possibly best of all, now that you have done so, should you ever need to “go in” again, you have had practice… and the switch is now held together by one or more screws, not rivets!
[1] This phrase, which i may have made up, refers to the stories i have heard about the miracles Cuban auto mechanics perform remaking unavailable (to them at least) parts for the many 1950s American cars there. It is meant with the utmost respect for these amazing abilities to get in and repair devices not originally intended to be repaired (in most cases).
[2] Decades of experience have led me to prefer Caig Laboratories products over others, to the point where i have a page discussing Caig products.