Wiring Notes and Information for the Breville 800 series Espresso Machine
Mark Those Wires Before Removing!
Many of us expect wiring to be fully color-coded from the factory in our devices, based upon common practices across a number of industries which utilize electrical wiring. For many common types of electrical wire—household, automotive, general electronics—it’s fairly easy to supply wire insulation in a wide range of colors, for easy color coding.
In the case of wires requiring high temperature-withstanding insulation, this seems not to be the case. At least that’s the circumstance Breville found themselves in, else a choice they made. Their 800 series (800ESXL and other eight-zero-zero model numbers) use only 5 cloth insulation colors:
Push-on “Quick Connect” Terminal Wire Colors:- blue
- brown
- red
- white
- yellow
The multi-pin connectors take care of themselves: they only each fit in one socket, and one orientation. It’s the “quick connect” connector wires which attach individually to the PCB that tend to mess people up (✋). Since it’s not totally obvious to which letter Quick Connect connector on the PCB each individual wire attaches, before disconnecting any wires, mark each wire with its corresponding PCB connection point letter. Example: there’s a brown wire which attaches to a lone terminal on the PCB near capacitor C1, marked R on the PCB. Put a label on that wire labeling it as “R”, then feel free to disconnect it.
I’ve generally used stick-on paper labels. These tend to come off easily, and being potentially flammable at high temperatures and easily damaged by liquids, in any case need to be removed once the connections are re-established, before final reassembly and putting the espresso machine back into use. Advantages include being fairly inexpensive and readily available.
A “level up” would be sourcing permanent labels rated to safely withstand high temperatures and hot water (in case of internal leaks, which do happen). These used to be available from decent electronics stores: pre-marked with single letters and numbers, self-adhesive. A quick look on Digi-Key on 20 November 2025 reveals no such thing: only expensive things which need to be run through printers and printed. Klein Tools 56253 Wire Marker Book, Black Letters, Numbers, and Symbols (Amazon) is one possible option for what i’m trying to describe:
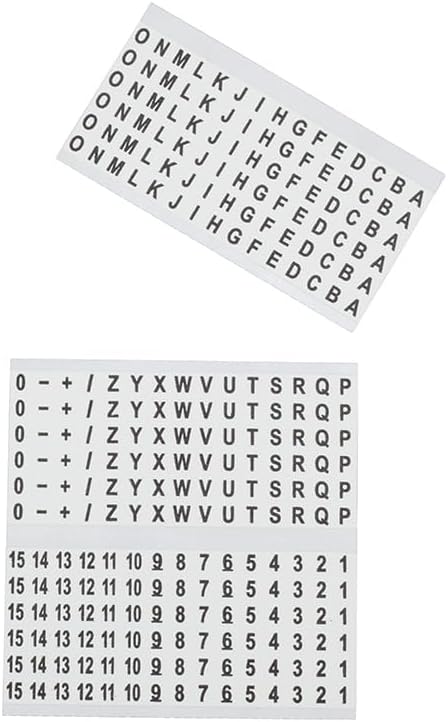
The main issue with this particular product is i can’t easily find a specification for heat resistance. Because it was late 2025 when i did this research and most of us were playing with AI, i asked Amazon’s “Rufus” AI for letter labels able to withstand high temperatures and moisture and costing US$20 or less. No accurate results came back (big surprise… Not!). It is up to you to do your own research and work out what will be safe, if you choose to leave the labels on permanently.
However you do it, labeling each wire in some manner whereby you can quickly reconnect each of them to the correct terminal on the PCB will save you loads of time, and may help prevent damage (or worse) from an improper connection.
Not Marked? Trace Those Wires!
Didn’t mark the wires? Received a used machine from someone/somewhere else where some or all of the wires were already disconnected and not labeled? Your safest, best, most reliable option is to trace the wires and figure out where each attaches. For a number of you, that last sentence is enough information. For others, here are the details on this procedure:
- Follow the disconnected wire back to its other (connected) end.
- Identify which device this is, and which specific terminal of this device.
Examples of what i mean by “which specific terminal”:
- The Heater (thermal block) has two connections (terminals). One has one wire which connects to nothing else. The other shares a connection with a thermostat (atop the thermal block). Which of those wires is currently in your hand?
- The N connection for the powerline has all sorts of other things connecting to it. The L powerline connection has only one (the thermal fuse atop the thermal block).
- Locate the representation of the physical device on the schematic. Notice how many terminals the device has (usually two, though some switches have three).
- Match the disconnected wire in your hand to the terminal of the device on the schematic with the same number of other connections (zero other connections to several other connections).
- Follow that connection on the schematic to one of the lettered terminals of the printed circuit board on the schematic.
- Find that letter on the actual circuit board for your machine.
- Connect the wire in your hand to that letter terminal on the board.
- Repeat all these steps for each other connection.
Take breaks if beneficial. Verify the connections until you’re satisfied that every wire has been properly reattached. If you have continuity testing equipment and skills, you’re encouraged to double check continuity from each device’s terminal to the respective connection on the PCB or elsewhere.
Unable to Trace? Here Are Some No! and Yes Pictures
 IMPORTANT: YOU are solely responsible for your wiring efforts! This page, and indeed this entire article, is provided AS-IS to provide information which may help you repair your espresso machine. The safe way to reconnect wires in your machine is to use whichever schematic best matches your machine, continuity testing if you’re able and want additional verification assurance, and your own common sense per the Trace Those Wires! section above. No one at siber-sonic.com nor any site correspondent nor anyone else is responsible for your ability or inability to accurately interpret the wiring in the “correct” photo below and implement it on your particular machine.
Can’t read schematics/wiring diagrams and are unable or unwilling to learn? Even though i carefully labeled each part on my schematic with standard English words such that no one needs to understand what any of the symbols mean, there is at least one report of someone struggling to decipher that information and figure out where the wires go.
Luckily for anyone else who may find themselves in this situation, site correspondent Steev from southern Maine kindly provided photos of Wrong and Correct wiring, with the wire ties removed to make it easier to see where each wire goes. Have a look:
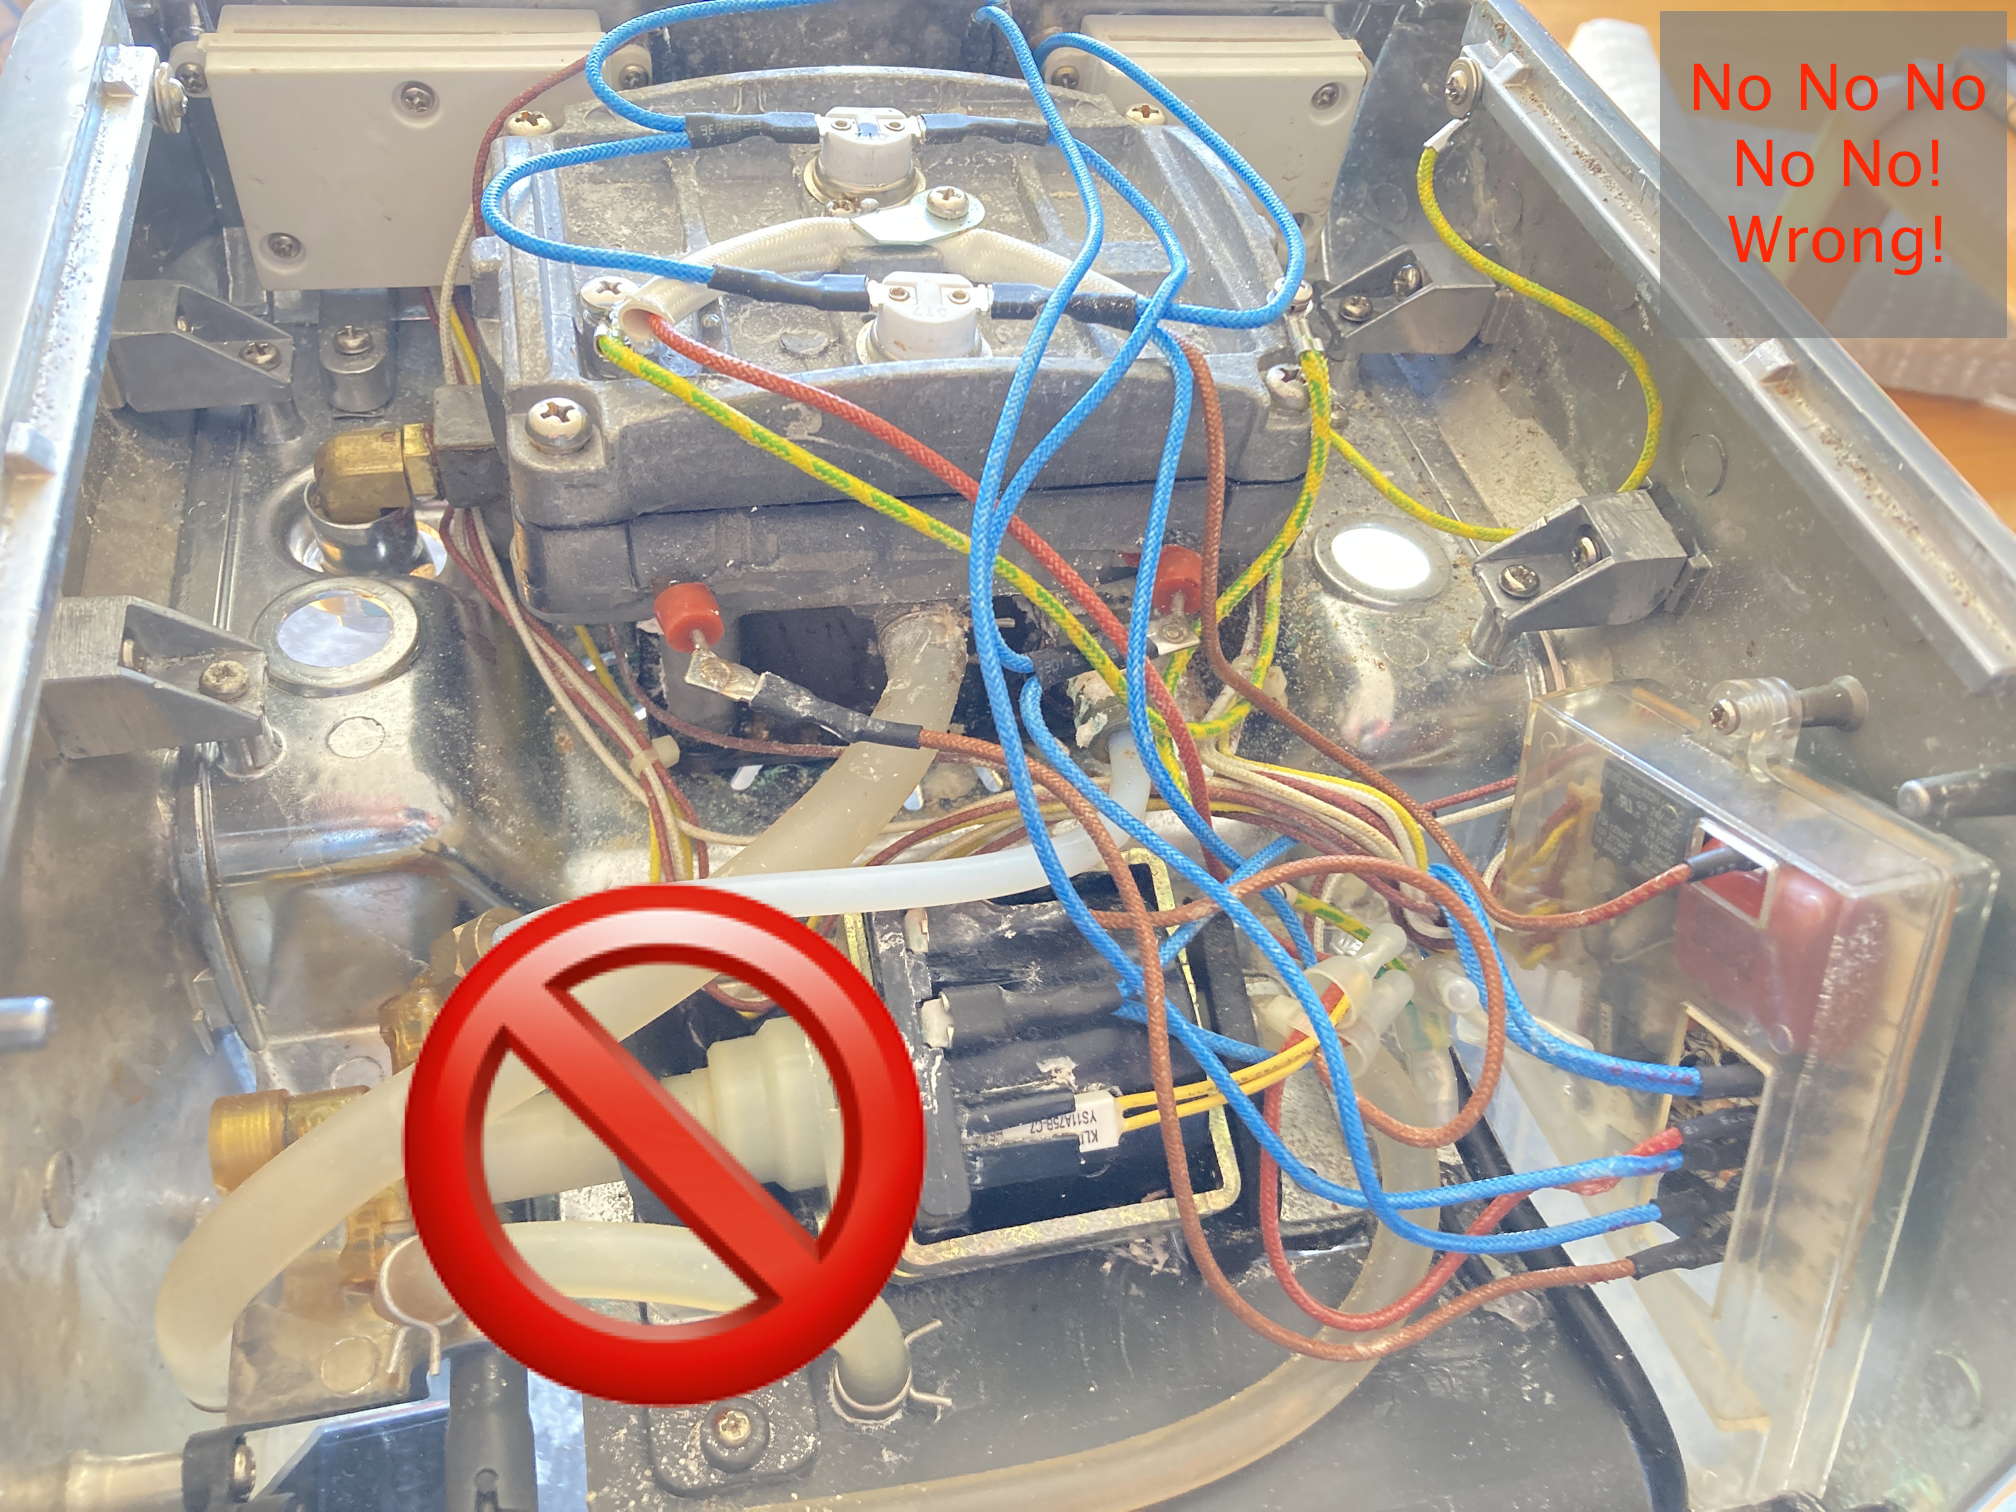
This is one of many Wrong ways to connect the wires. Don’t power up your machine like this!
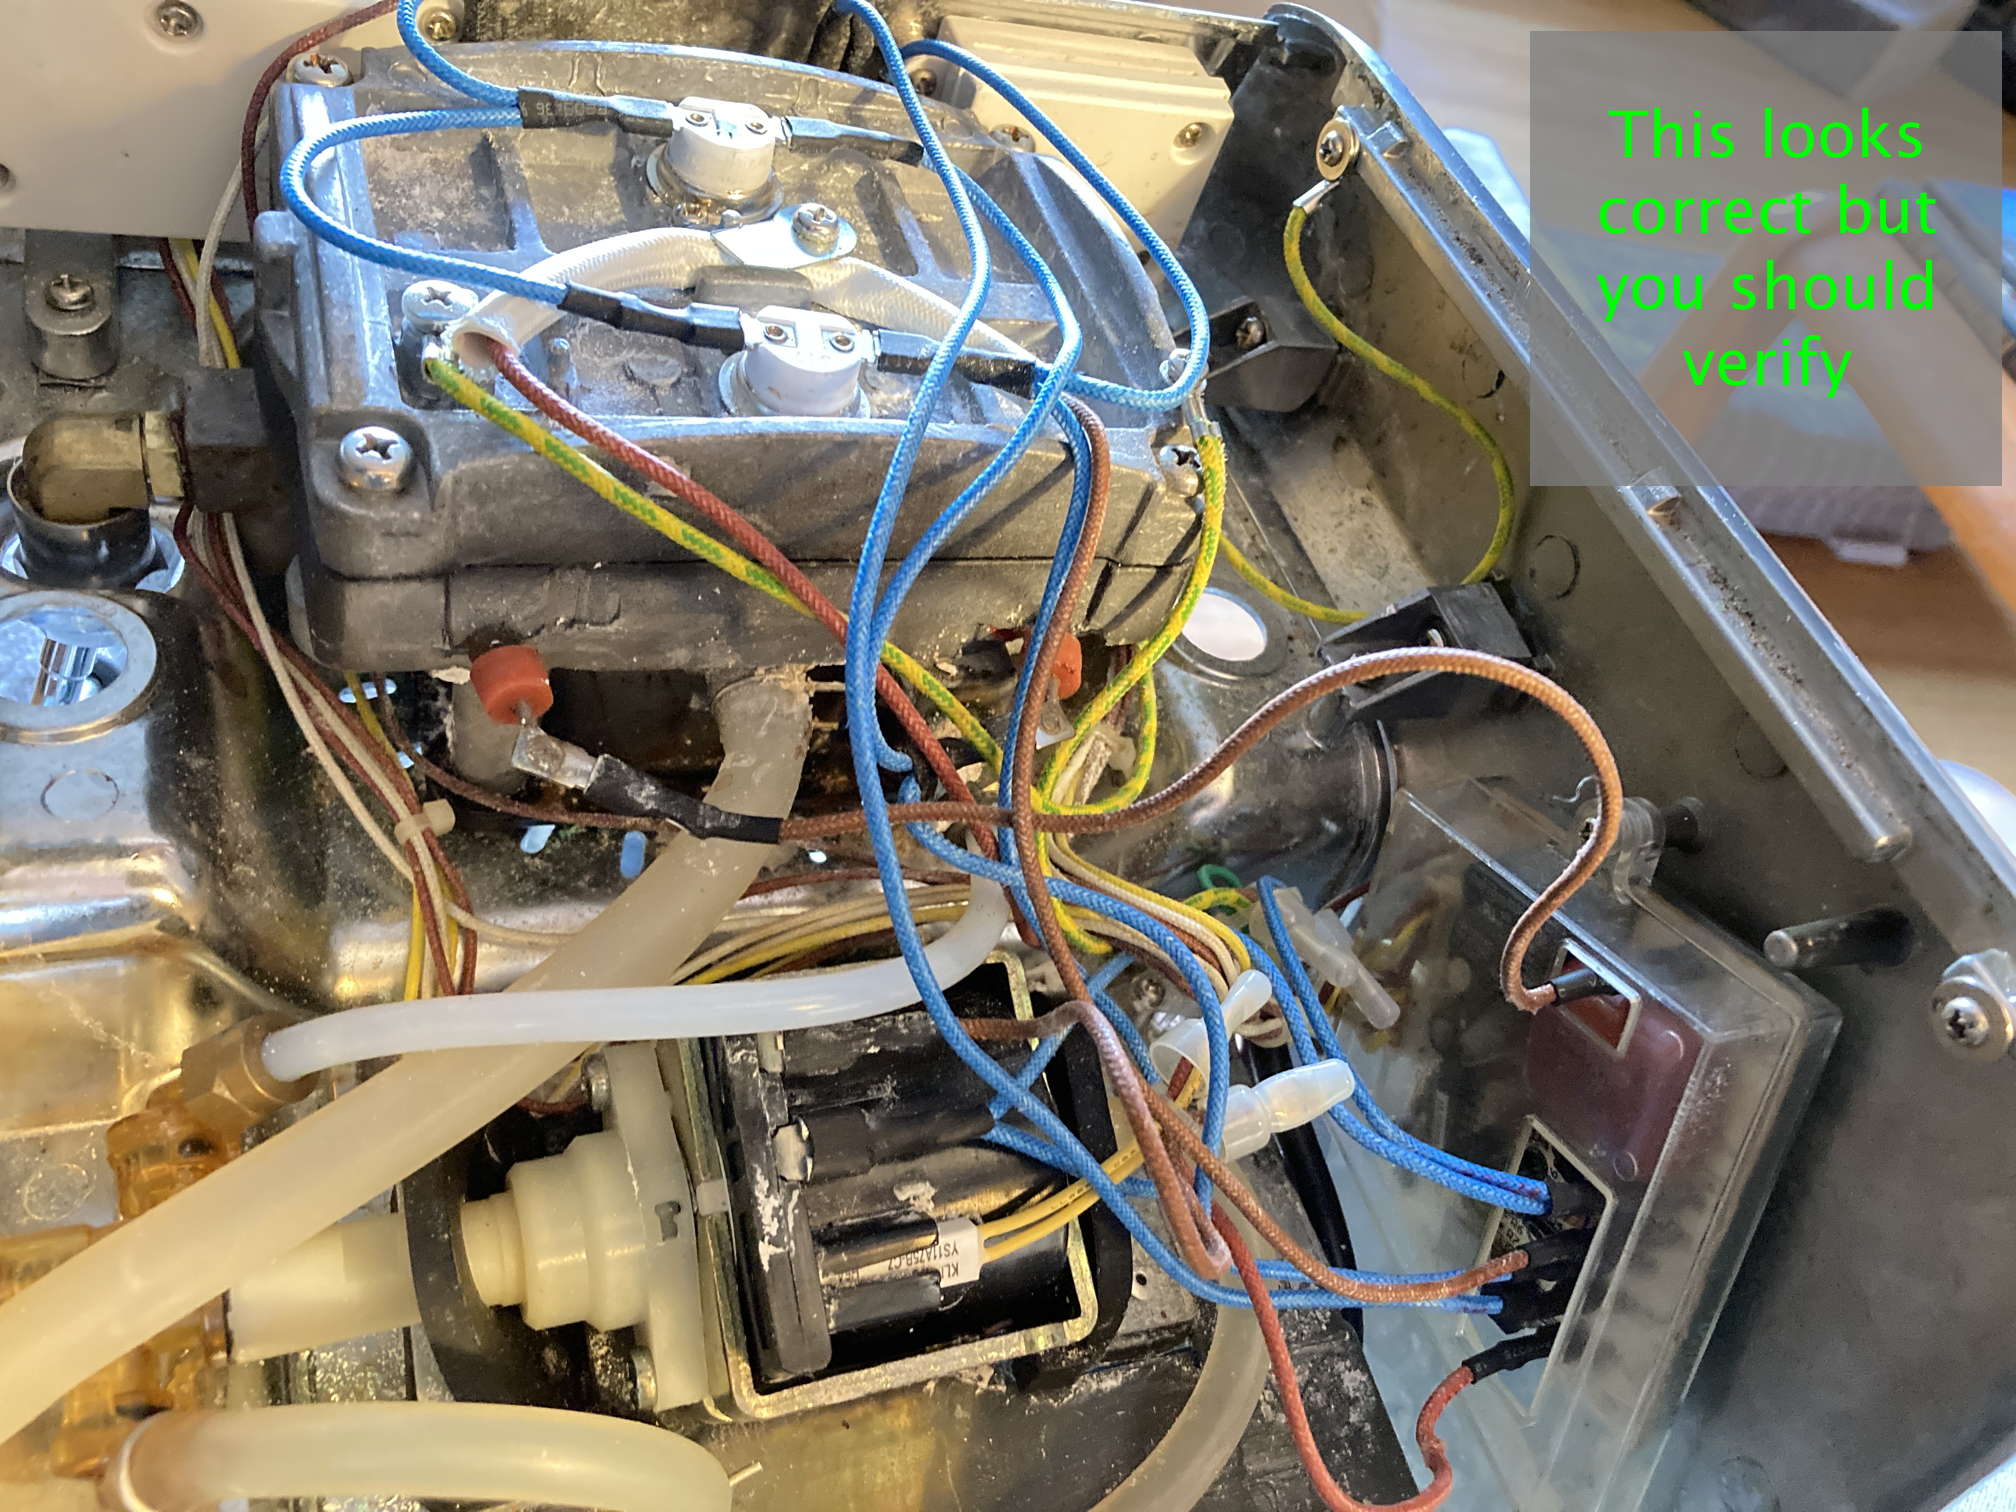
This shows every wire connected correctly
As a last resort, if you cannot or will not trace the wires per the section above this one and they were not marked before disconnecting, carefully study that last photo and attach each wire as shown.
Return where you were in the main Electrical/Electronic Issues - Breville 800ESXL Repair article
 World O’ Appliances/Household/Plumbing/Irrigation/HVAC/Hardware