Secure Email S/MIME Certificate Installation on iPhone
Note: To save on website hosting costs, screenshot images from various macOS/OS X versions (from other articles in this series) are used in this article. The actual macOS version used for testing was 10.12.6 Sierra, because that’s the most recent version through the end of OS X as in 10 (i’ve not tested macOS 11 Big Sur nor later) where Apple’s S/MIME functionality actually mostly worked.
In this article i use iOS generically to cover all Apple non-macOS OSes for devices able to run Apple Mail. It is critical to note that i have only tested iOS 9.3.6 on an iPhone 4S and very briefly on an iPhone 11 running i believe iOS 13.5.1. Things might work totally differently or not at all on the iPad with iPadOS, etc.
Some people find installing S/MIME certificates onto Apple’s iDevices (the ones able to run Mail and utilize them) straightforward and relatively easy. Others find it a torturous process, or even an exercise in futility.
This article is my best attempt at covering this topic, without investing too much of my life in more endless testing. Hopefully it will sufficiently summarize the situation to make your path on this adventure smoother. Links to other, possibly more complete articles (where those articles’ authors found success and which were actively online as of the last revision date of this page) are included. What makes this article unique amongst those i’ve seen is it’s the only one covering installing self-signed certificates in iOS.
Basic Big-Picture Overview
When it works, there are 2 basic ways to move security credentials—a certificate with matching private key for you, and just a certificate for your other correspondents—onto an iOS device:
- Email the credentials to yourself. Open the email in Mail on the iOS device. Open the attached file and follow the system prompts to verify or install.
- Use Apple’s Configurator app on your Mac to do a cabled USB transfer to your device.
There exists some 3rd. way involving something from Apple for enterprise and/or school/institutional users with a name involving Mobile Device Management, initialized as MDM. I don’t know what this is, don’t want to know what it is, and likely don’t have access to it, so it is not covered here. Apparently it is a different form of device management software from Apple which can transfer security certificates.
The Configurator app is available in Apple’s App Store. As of the most recent update of this page, it is Configurator 2, runs only on 10.14 Mojave and later, and is getting absolutely slammed as really bad software in the reviews.
Method 1: Email To Yourself (details)
- In Keychain Access on the Mac, select view (may not be essential, but this is what i did)
- With the arrow closed (right-pointing, and this may not be necessary but is what i did), select the relevant certificate:
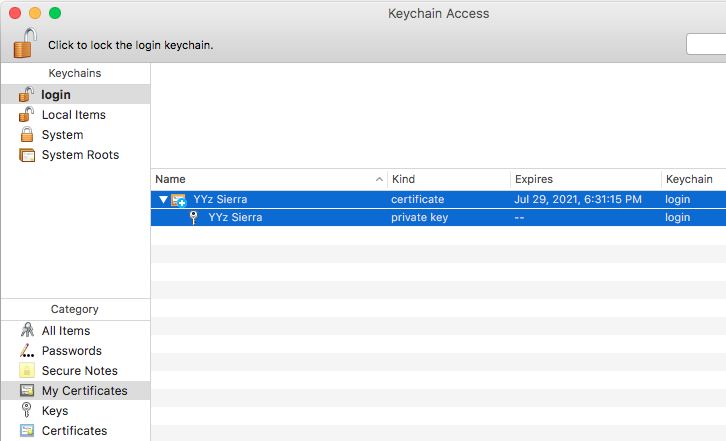
If the arrow is down-pointing so it’s showing the related private key, ensure that both the certificate and key are selected: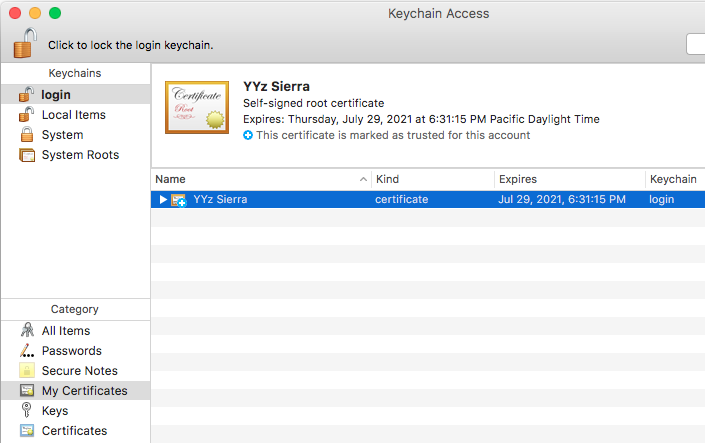
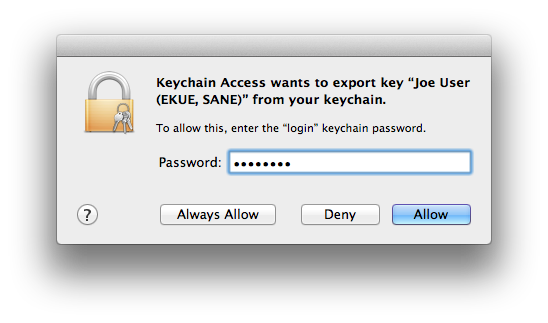
- Go to , or if you prefer use this function from the contextual menu. Keychain Access will ask for your authorization to export your private key (I’m reusing an existing screenshot here, so the key name is something else rather than YYz Sierra. For you the names will match):
- The Save dialog should default to File Format: Personal Information Exchange (.p12). This will contain both the certificate and the private key, assuming you selected both two steps ago. Save this .p12 file in a convenient location:
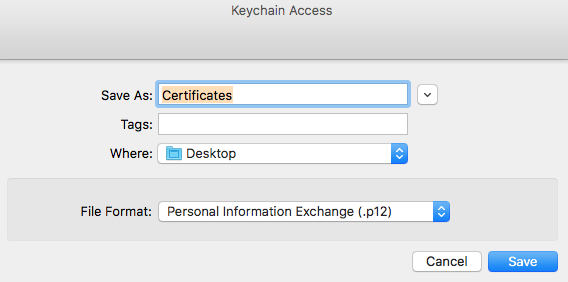
- When you save the .p12 file, you will be prompted for a password/passphrase:
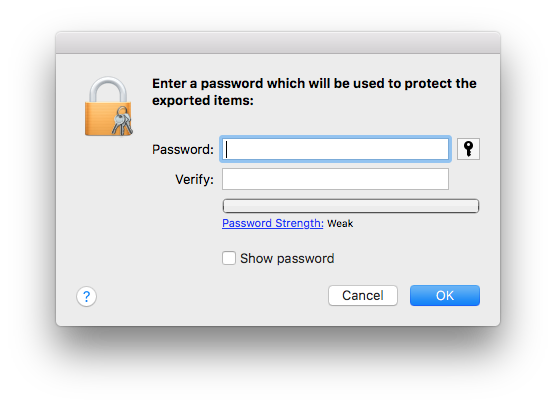
Enter a password or passphrase strong enough to keep these items secure through the emailing process, until you can do the transfer, verify that it works, then delete all traces of the email message. If using a service hostile to deletion like GMail, consider an extremely strong passphrase. - Compose a new email message on the Mac. Attach the .p12 file. Email from the Mac to the iOS handheld device.
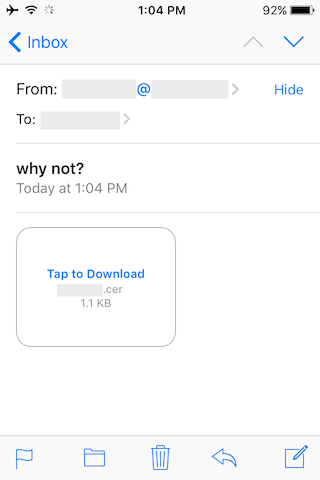
- Open the email message with the .p12 file. (Note that i was messing around and did things a different way, thus in the screenshots you’ll see a .cer certificate file. The steps should be identical for a .p12.) You may be urged to tap the file icon, or you might not:
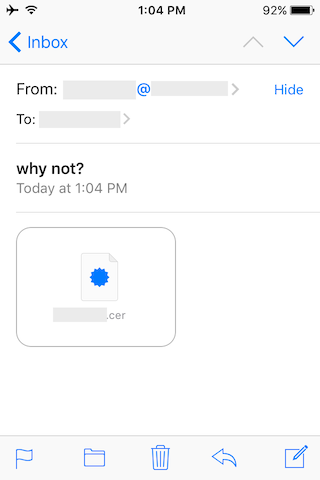
- Once you’ve tapped, the initial verification window appears. Note that even though you’re dealing with a .p12 certificate and private key package, or maybe later another user’s .cer certificate (as in my screenshots), iOS calls it a profile:
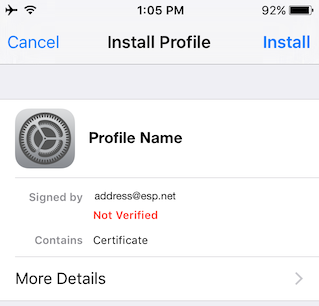
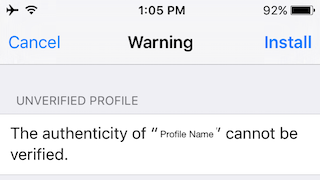
Somewhere in here you’ll need to input the password/passphrase for the .p12 file that you created in step 5. Because in my flailing around i already had installed my certificate and private key via Method 2 below, i don’t have a screenshot of this, nor do i know exactly where in this sequence you’ll be asked for that passphrase. Carefully type it in when asked, and continue. - Tap Install and you’ll get a warning that the authenticity of the profile cannot be verified:
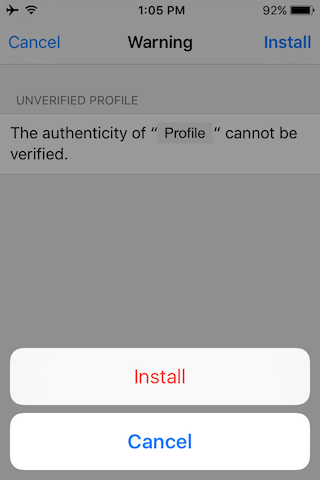
- Tap Install again and you’ll get an overlay with yet another Install button, in red text this time:
- Finally iOS will (or should) relent and actually install the item:
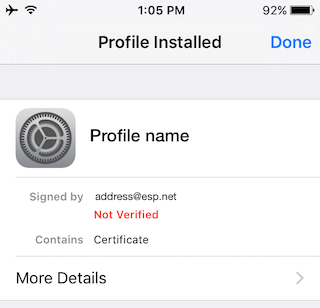
Notice that it is still not verified. That’s as far as i could get at this point. I tapped Done. - Go to Settings → Mail (this wording may vary per your iOS version. for 9.3.6 it’s Mail, Contacts, Calendars) → your specific account under Accounts → Account → Advanced. Enable S/MIME, then you will be able to enable the two separate options Sign, and Encrypt by Default. Back out to the Account view and tap Done to confirm the changes.
Method 2: Apple Configurator
Using a trick i read about online, i gritted my teeth and ran macOS 10.15 Dogalina on a spare external hard drive. This allowed me to use the App Store to install the latest version of Configurator 2 (as of the most recent update date of this article), supporting 10.14 Mojave and later—the only version Apple lets anyone have… initially. I then restarted from my usual 10.12.6 Sierra and again went to the App Store, to the Purchased section (Configurator 2 is free). When i tapped Install, the App Store churned awhile then wisely offered me the last compatible version for my OS: 2.7.1. I gladly installed it.
I went through the whole process of creating an entire profile(!) just to get the certificate and matching key into the iPhone. I did not and almost certainly will not ever document this process in step-by-step detail. It is more steps on the creation end in Configurator and fewer on the device itself. Well, that procedure eventually worked out, once i worked through an unexpected issue.
Trusting Others’ Certificates
Whichever method you used to get your certificate and private key set installed onto your device, you’re now good-to-go at your end with your credentials. But in the fine(?) tradition of Apple Mail on macOS, Mail won’t let you do anything useful until you have also installed and trusted your recipient’s/s’ certificate(s). Follow the same procedure as Method 1 above, having them email the certificate to you. It might be that under some circumstances on some iOS versions Mail might discover the certificate on an incoming signed not encrypted email message and offer to install it—i did not make the time to explicitly test this. For me i had to manually copy the existing certificate from my Mac’s keychain, attach it to an email message, and send it to myself, following the steps above. In this case you won’t need a passphrase for anything, though you will have to jump through all the verification hoops just the same.
Installed, Not Verified
At this point i could read already-received encrypted and signed emails sitting in my Inbox. First time i did so, there was a warning that the certificate for the person who originally sent the message was not verified—this is the one i moved over via email in the screenshots above. I failed to get a screenshot of what happened so i’ll tell you in words: there was a red exclamation point in a red circle which i tapped, letting me know that my correspondent’s certificate was not verified/trusted, and giving me the option to trust it. Unlike on macOS, this process actually works on iOS (at least 9.3.6), right there in Mail app. Further unlike macOS, the user is not presented with a whole bunch of checkbox settings: it just does the deed.
Bugs and Problems
I didn’t find any actual bugs in my brief testing, though i did initially have a Big Problem:iOS Device Fails to Treat Incoming .p12 file or .cer Certificate as Installable
Upon first attempting to work out and document the self-signed credential installation procedure for this article, for the life of me i could not get the Method 1 procedure to work past sending the file in email. Upon receiving it in Mail on my iPhone 4S/iOS 9.3.6 combination test system, there was no option to install nor verify nor any options remotely close to those. All that showed up were the usual options to share the file with others. I did try sending the certificate separately as a .cer and the private key alone as a .p12—neither of these worked, failing identically to the original combined .p12 file.
Being unfamiliar with iOS and related, what i failed to understand and appreciate was that existing profiles for the email account for which one want to use S/MIME very often conflict with or block S/MIME functionality, including the email-to-self Install steps.
When i originally set up the email account under test, my Email Service Provider (ESP) provided a very nice profile file which set everything up automagically. It also locked some things down, including S/MIME, likely for their idea of security. Or maybe that’s just how iOS profiles work—i don’t know. I went ahead and installed my credentials using Method 2, but while i could read existing encrypted messages sent to me, i could neither sign nor encrypt outgoing messages: the iOS controls for S/MIME were Off and could not be adjusted.
What i had to do to resolve the problem was:
- Delete the ESP’s profile. This deleted my entire email account in Mail on my iPhone
- Shut Down the iPhone. Wait half a minute or longer. Restart. This is important!: iOS has to restart to realize that the profile has actually been deleted, else parts of the OS + bundled software will act as though it’s still there. I still could not adjust the S/MIME controls until after this restart, despite the profile having already been blown away.
- Use the ESP’s manual email account setup procedure (elaborate and time-consuming)
- With the email account working again, now go adjust the S/MIME controls as desired.
Note that if you have a company/school/institution-provided Apple handheld device capable of secure email and your institution is using profiles and/or managing devices, unless you can convince your IT peeps to make a special profile for you with the added security credentials, S/MIME email and especially with self-signed certificates may not be an option for you.
“Incomplete! Confusing! Links To Other Articles, Please”
Here are the ones i’ve found to date that seem relevant:- Encrypting Email With iOS Mail – A How-To on MacObserver. When i composed this article, i read the version from March 2017, tested with iOS 10.2.1. One comment indicates the steps in this article as it was at the time didn’t work on iOS 11, but there was no follow-up. As of 17 September 2020, this Mac Observer article was updated on Aug 17th, 2020 11:20 AM EDT, URL the same but title changed to Encrypting Email With iOS 14 Mail – A How-To. Note that this article covers getting certificates from an established certificate authority, not using self-signed certificates.
- This article on HTTPWatch is about self-signed SSL certificates, not S/MIME, and it goes back in time to 2013 and iOS 7 (likely 7.0.4), but maybe it will help someone.
- Relevant to Method 2: back on 18 October 2011, Khürt Williams wrote about iOS 5 Secure Mail using what at the time was the iPhone Configuration Utility, which has become Configurator. As with the MacObserver article, he’s covering the case of obtaining a certificate from a certificate authority whose root certificate is already trusted in iOS.
Comments? Found an error? Let me know, and i’ll see what i can do.