Unibody MacBook Pro Keyboard Replacement & Repair Follies
Generally regarded as the last—so far (we hope)—user-upgradeable and somewhat repairable portable Macintosh computers, woe be upon you if you’re faced with a 2009-2012 Unibody MacBook Pro with a failed keyboard. Yes, it is field repairable by mere mortals, though doing so requires infinite patience, fortitude, willingness to nearly entirely disassemble an otherwise-working computer all the way down and past main board removal, and shepherding 50-some approximately 1 x 2 mm screws holding the extremely flexible thin aluminum keyboard frame to the thick aluminum unibody chassis. Don’t break that backlight (details below)—not a readily available aftermarket part!
This is the saga of establishing a fully-workable keyboard in my 15" Mid-2012 MacBook Pro Non-Retina (e.g. MacBookPro9,1). Most, but not all, points made apply equally to other Unibody MacBook Pro model years and/or screen sizes. Ready for an adventure? Let’s go.
Which Replacement Keyboard?
You don’t have a lot of options, bucko. There’s nothing out there in the aftermarket with the (relative) quality of an Apple original keyboard, and they don’t sell replacements. Options:
- Used original Apple keyboard, either as a whole top case (Housing, Top Case with Keyboard, Backlit if one is being precise), or just the keyboard… likely removed from a dead unit’s top case by you
- Aftermarket keyboard (lots more information on this below)
- Be more sensible: move to a Different (fully working) Mac
- Give up on this difficult repair Apple ridiculousness: Get a good repairable PC portable and run Linux
I did not list “Use an external keyboard”. I tried that: extremely annoying reaching over the external keyboard to manipulate the trackpad. If you’re going to add an external pointing device too, your portable Mac is now that much less portable. Why not use an iMac or Mini instead?
In a way maybe we should be thankful that Apple used screws to mount the keyboard rather than spot-welding or similar. There’s likely a reason they didn’t/don’t sell replacement keyboards separately: too difficult a repair!
How Keyboard-Dependent Are You?
If you’re a casual keyboard user, you might be OK with an aftermarket keyboard.
If you’re a writer or gamer or any other form of heavy/intense keyboard user, aftermarket keyboards will disappoint you. I am a writer typing to you from an aftermarket keyboard. I am highly disappointed i chose that path.
Aftermarket Keyboard Option
There’s no pluralizing S missing from the last word of that heading: one factory in China Inc. seems to be making the only Unibody MacBook Pro aftermarket keyboard that i could find in summer 2020. No matter which seller, looking very closely at the photos, all the keyboards looked identical. Seems to me from my intense shopping at that time that there is only one choice, sold by different entities.
The iFixIt 161-121-1
I chose to pay a little more to iFixIt for their 161-121-1 (sometimes written 161121-1) MacBook Pro 15" Unibody (Mid 2009-Mid 2012) Keyboard, both because i prefer supporting iFixIt and because of their lifetime warranty. Best decision i could have made, for an aftermarket keyboard: i’m on my third (sort of. Keep reading).
This keyboard is passable for a casual user. Notwithstanding the reputation of many writers being keyboard-fussy, i myself am not particularly critical. From the get-go it felt and sounded a little different, but not enough to be a problem. Nearly all the keys worked for critical use, and the one that didn’t (left Command key) reliably worked when pressed in the center or top or right, or harder. Looks about the same; backlight (transferred from the original keyboard—no backlight replacements!) works close enough to the original keyboard for my purposes.
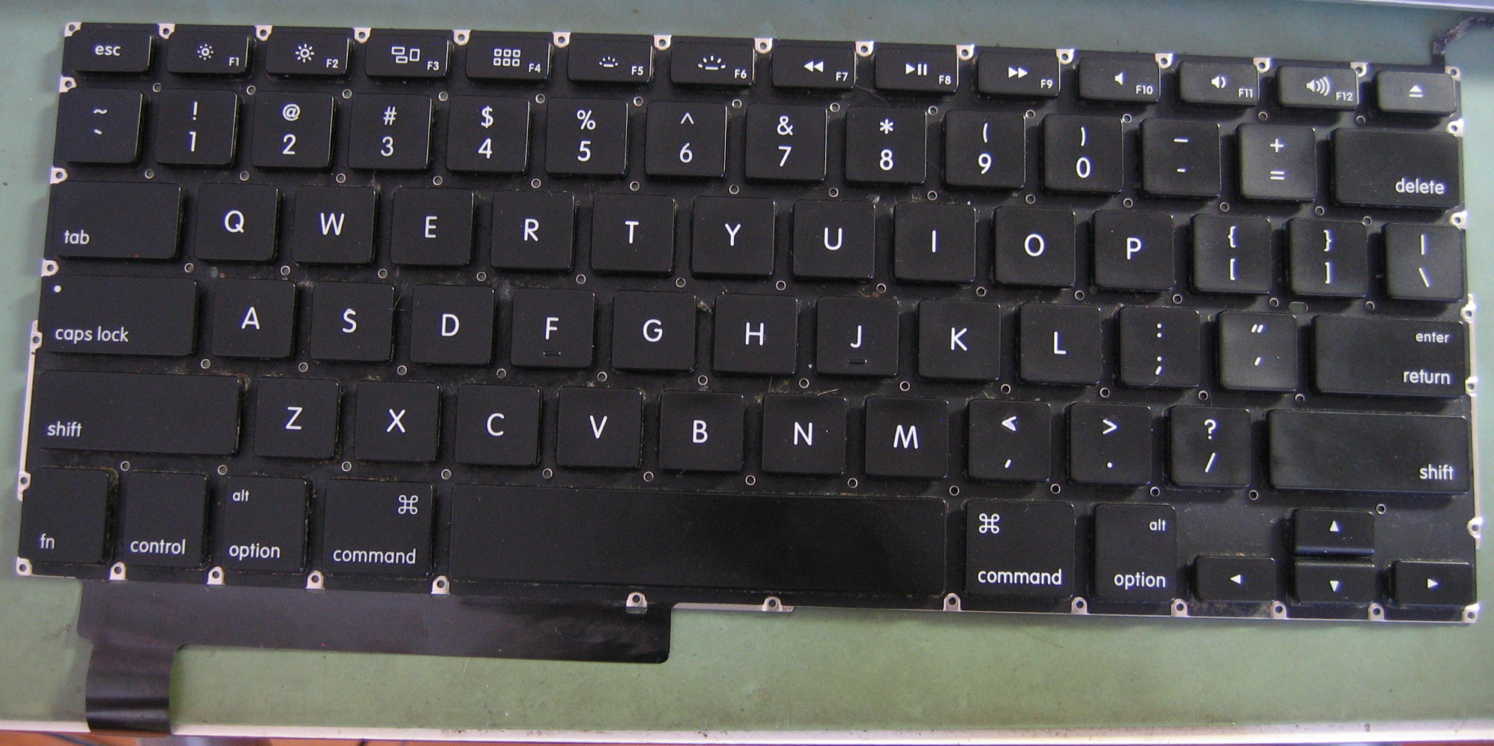
Keyboard I.D.
Here are some pictures of the keyboard sold by iFixIt, for you to compare with similar offerings of other vendors:

Short-Lasting
The biggest problem for a keyboard-intensive user is durability: these won’t hold up, in my experience. The space bar failed in about 7-8 months’ time: one of the stiffening wires popped out of its keycap retainers:
To the left of the space bar is the back side of the left Command key and next to it its hinge, showing very similar design to stock Apple key caps and hinges. Repairs on this keyboard are discussed below.
Poor Quality
Out of 3 keyboards (original purchase and 2 warranty replacements) so far:
- All 3 have the identical failure of the left front quadrant of the left command key being all too insensitive, leading to vastly too many intermittent key presses
- First one suffered the space bar failure described above
- Most recent one: both Command keys suffer left front quadrant insensitivity and in addition the F2 and F5 keys are flaky: intermittent. This is the most recent keyboard sent—quality level going down!
iFixIt Issues
I’m very much part of/supportive of the Right To Repair movement, and a fan of Kyle Wiens of iFixIt. The site has great advice not available other places, and they sell some excellent tools and tool sets. This whole keyboard experience has made me less of a fan.
- When asked whether the key caps pull straight off or if there was anything tricky about them, iFixIt Support was unable to answer me. iFixIt couldn’t help me fix a keyboard they sold me! What is up with that?!
- When asked whether perhaps someone there could QA test a keyboard so i’d receive a known-good one (given how hard they are to change), iFixIt Support informed me that QA was up to the OEM (but they’d be glad to send me another replacement). Really now? That does not seem like standing behind one’s product to me.
- Two of the three keyboards i’ve received so far arrived bent. First one arrived with one corner slightly bent (easily flattened with long nose pliers), and packed at the very bottom of the box with the bubble wrap entirely above it—not sure what that was about. Power button flex cable had an extremely sharp bend as-shipped. Dear iFixIt: up your packing care. The shipping boxes you use are a reasonable size for the keyboard with protective padding properly applied. There’s no earthly reason for these keyboards to arrive physically deformed.
Unibody MacBook Pro Keyboard Replacement
Test Your Replacement Before Fully Installing
This is such an extremely deep dive, your day (or week, or longer) will likely be ruined if you go to all the trouble and careful work, just to find that your replacement keyboard is less than fully functional. With the poor QA of the aftermarket unit from China Inc., testing becomes critical.
Test Setup
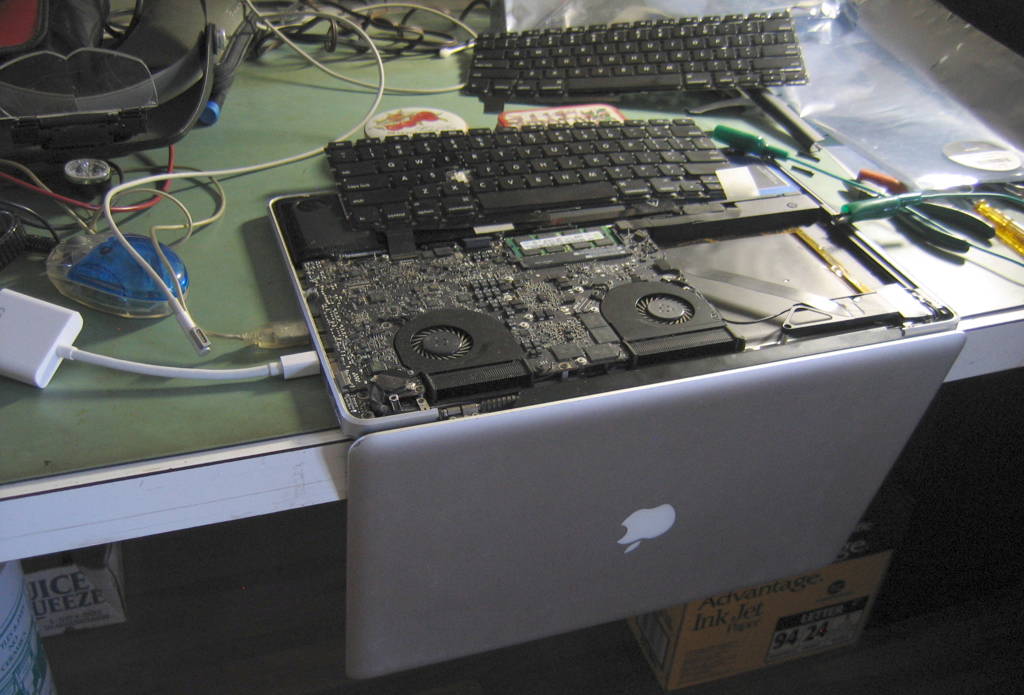
Due to the flex cable orientation, unless you arrange a significantly long extender arrangement (see below) you’ll need to run your MBP in an unusual position, with an external display and pointing device:
It will be kind of you not to ask how many hours i lost due to ignorance of that fact. Setup, step by step:
- With your MBP set up in normal position, attach an external display and pointing device (mouse, trackpad). Ensure that the external devices work and set the Displays system preference for video mirroring. Shut down your Mac.
- Turn your MPB upside down on your (hopefully antistatic) work surface, so the top edge of the screen is pointing towards the floor, as in the image above.
- Remove the bottom cover (if you haven’t already).
- Disconnect the failed built-in keyboard and attach the replacement keyboard under test—details on this next.
To Extend (for testing), or Not To Extend?
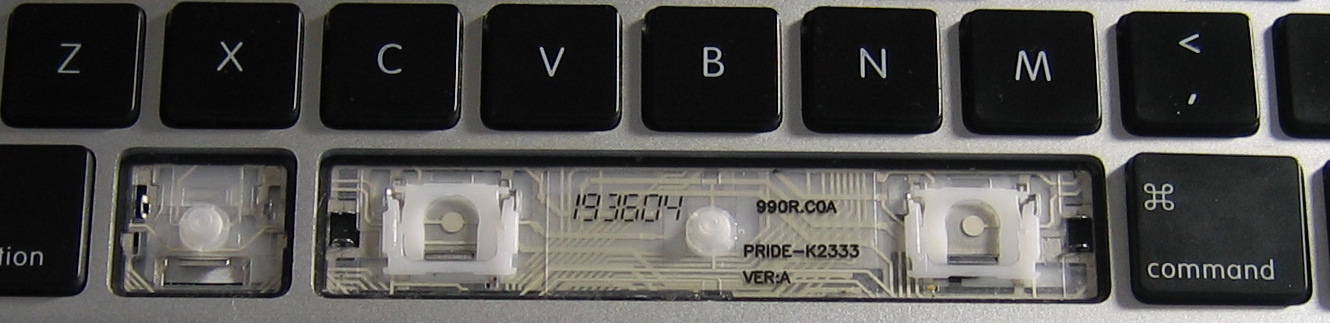
First, a look at the keyboard connector, with its cover shield (held on by two very small black screws) removed:
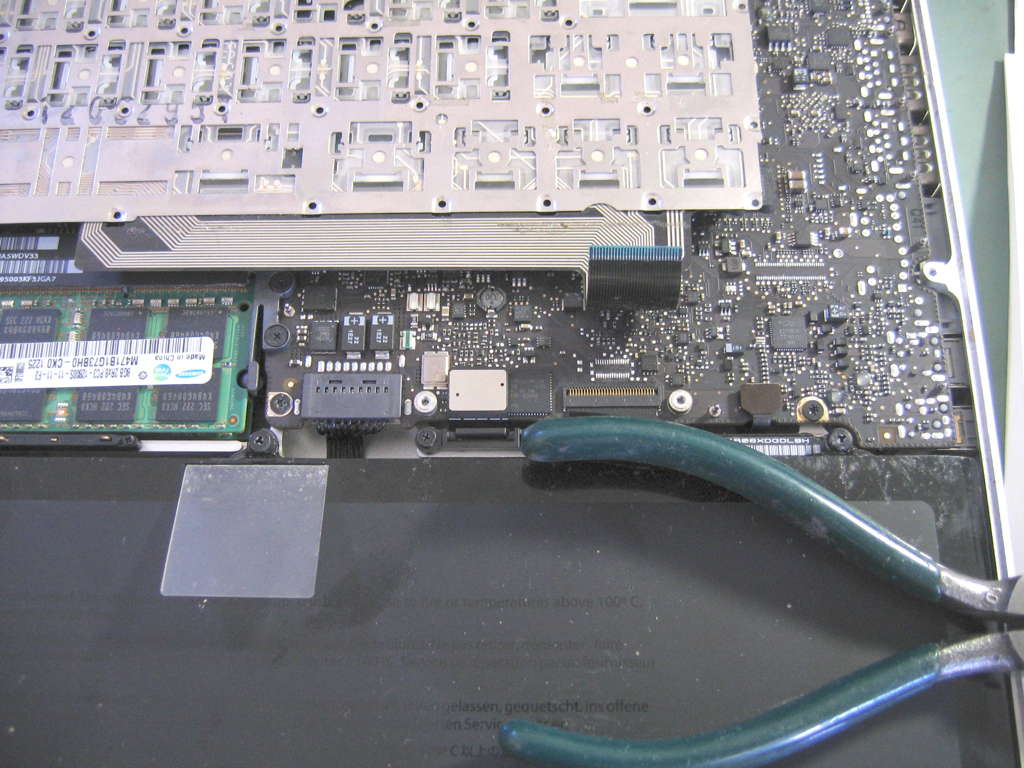
The connector is just above the top-most green handle of the wire cutters, which is holding the pull tab on the existing keyboard’s cable out of the way so you can see the connector and its contacts. There is a flip-over-top locking latch, not truly visible in the photo. Be sure to unlock this latch before removing or inserting cables. Details on this (and better photos) should be available on any decent repair guide (e.g., at iFixIt, such as this MacBook Pro 15" Unibody Mid 2012 Logic Board Replacement repair guide, Step 20) for your model. The connector and cable location differs between the 13" & 15" models, but the number of pins/wires/contacts (30) and the style of connector should be the same.
In this same photo we see a replacement keyboard lying atop the main (logic) board of the Mac, showing its cable’s relative orientation once installed.
Extend
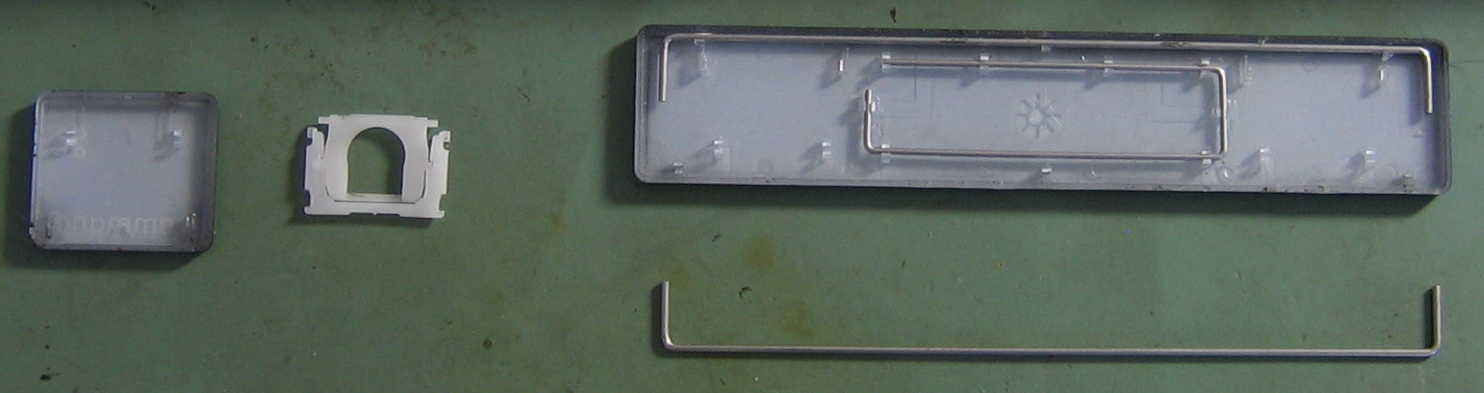
For a thorough test of a replacement keyboard before installation, ideally one wants the keyboard on a flat, stable surface. A cable extender fits the bill nicely. Too bad no one makes a 30 pin FFC/FPC extender! I spent far too much time trying to find one, eventually resorting to the combination of a standard 30 pin extender cable with contacts at each end (Molex 0151660325 from Digi-Key) and a 40 pin extender adapter (Adafruit 4523):
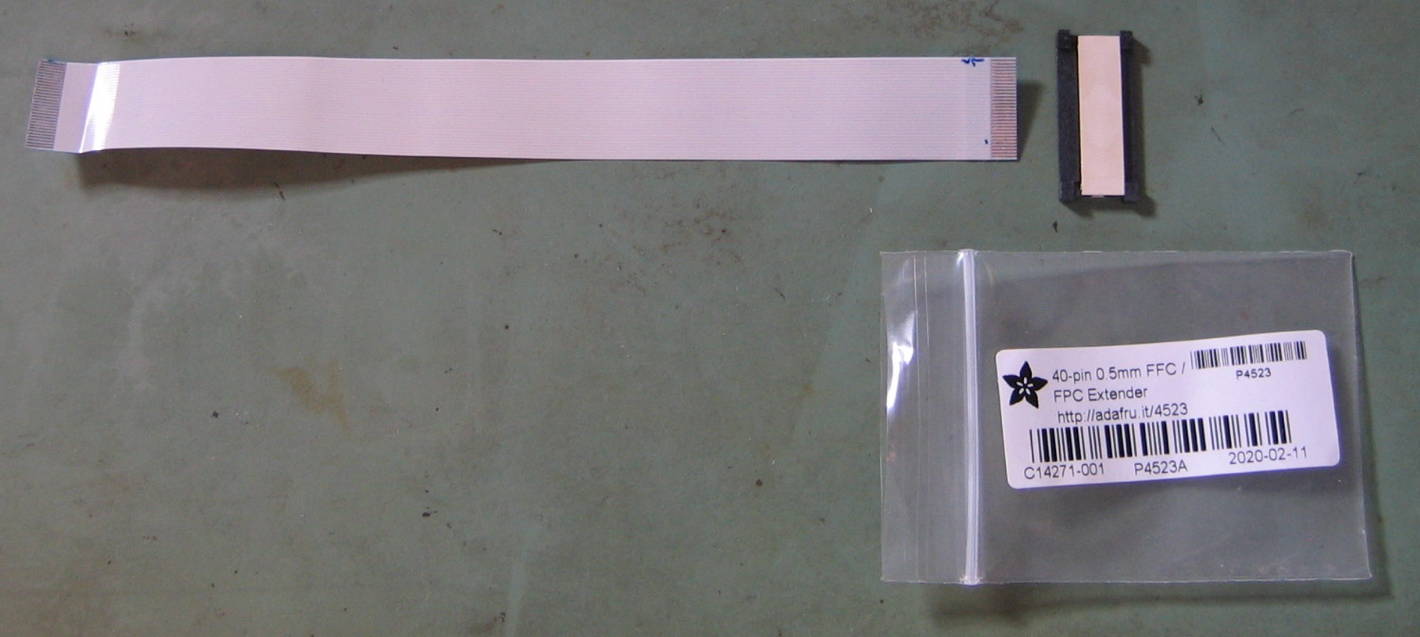
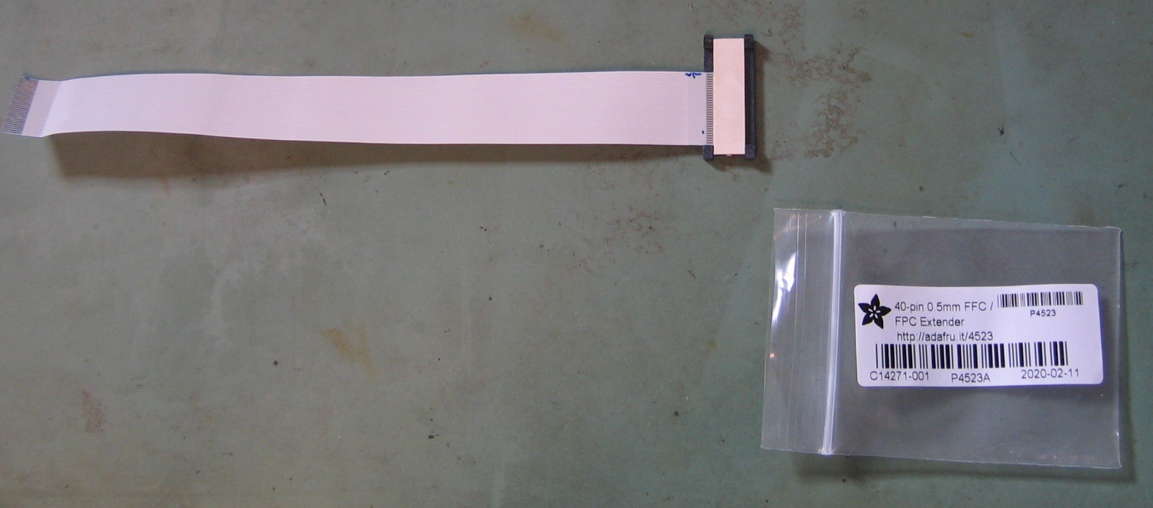
First photo shows the extender cable, extender adapter, and the adapter’s bag. Note how the locking tabs on the adapter are unlocked (pulled out) on the left side and locked (pushed in) on the right side. The locking tabs move in the direction of the cable length. Second photo shows the cable and adapter assembled.
The extender cable i chose is too thick (at 0.30 mm nominal) for the Mac’s main board connector, hence i had to sand down the stiffener on the back side until the total thickness at that end was 0.25 mm:

The Adafruit adapter has no problem with the stock 0.30 mm cable thickness. Now if you’re more clever than i am, instead of the 6" length, you can order the 12" length Molex 0151660335 or similar. The extra length should let you do a cable twist, such that the keyboard may be face-up in front of the MBP, the latter also in its normal face-up orientation. This will save you having to use an external display and pointing device.
Really, iFixIt ought to make an appropriate one-piece extender available. Given the low quality of the keyboards they (and everyone else) sell for MBP Unibodies, they’d do well to bundle keyboard and testing extender.
Not To Extend
It will be easier, faster, and cheaper to merely run the MBP upside down and directly attach the short cable of the keyboard under test to the Mac’s main board keyboard connector without a cable extender. The issue becomes stabilizing the keyboard sufficiently to be able to thoroughly test it before the agony of installing it. The photo above shows what this looks like, with stabilization of a sort provided by two metal candy tins along the under-test keyboard’s top/back edge.
Mac Startup Foibles—An Important Aside
Beware of some intentional, coded-in differences in starting up this series of Macs under test/repair conditions:
- If the power supply is connected and the main battery is not, your Mac won’t start up anywhere as fast as usual. Power-On Self Test will take 15-20 sec. after pressing the Power button before allowing the chime, because of the disconnected battery. I thought my first replacement keyboard’s power switch was defective, until i realized what was going on.
- If both the battery and power supply have been disconnected for awhile, then the battery is reconnected followed by the power supply within a short time (a minute?), the Mac will start itself up without any Power button press. This seems to be programmed in for factory testing. If you connect the battery then wait several minutes before connecting the line power supply, then the Mac stays off and can be started with the keyboard’s Power button as usual.
Test That Keyboard!
Trust me, you don’t want to install a less-than-perfect keyboard!… unless you really, really enjoy frame-off older Mac teardowns and rebuilds. I strongly recommend going past a basic quick test. Here’s what i currently do:
- Start with a basic test:
- Start the MBP using the under-test keyboard’s power button. (Unless all power has been disconnected. See above aside.)
- Open Keyboard Viewer
- Press each key in turn, ensuring it works
- Check the Caps Lock light and ensure you’re happy with it. (I’ve not had a problem with any, so far.)
- Repeat the above test with both slow and fast presses
- Press each key only on the keycap’s left side… then the right side… then the top… then the bottom… then each of the corners
If your keyboard works flawlessly with all those tests, you’ve got a good one worth installing (and it’s likely an Apple original). If there are problems, you have to decide whether they’re significant enough to merit trying another keyboard. Hint: Yes! Unless you truly don’t mind glitchy behavior. I have yet to have one single iFixIt-sold aftermarket keyboard able to pass this test—not one out of the three (so far) they’ve sent me!
Got a good one? Good! Time to actually install it.
Keyboard Replacement Cautions
This is a summary, not a full step-by-step. For the latter, use the Apple service manual (through 2010) or whatever other take-apart documentation you can find (e.g. on iFixIt). Follow those instructions to remove the main (logic, mother)board, and the optical drive. At that point, you should be looking at the matte black plastic sheet which constitutes the back of the keyboard’s backlight.
- Carefully peel off the two layers of the backlight as one. In other words: do Not separate the layers, else you’ll destroy your backlight! Unsure how deep to go?: peel everything from that black backing down to the thin shiny aluminum metal back of the keyboard proper. I was able to do this first time, no problem. Just be careful and not in a hurry.
- Remove the 50 to 70-some screws holding the keyboard in place.

One or more of the magnet(s) swept over half of my neat pile o’ screws right off the workbench onto the floor. DinkaDinkaDinkaDinkaDink—screws all over the floor, spanning the directions and distances indicated by the arrows in the photo, starting from the big red dot initial landing point. Took me hours of careful looking, feeling, and, yes, magnet work to find ’em all.
Once you’ve not made my mistake, continue:
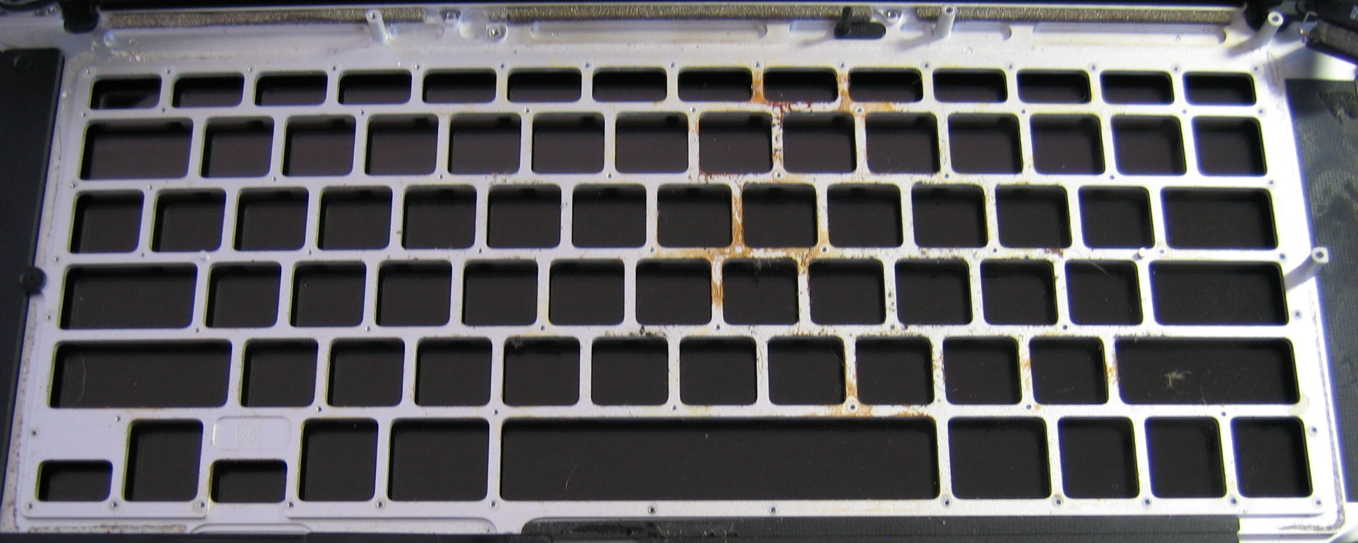
- Remove (lift out) the defective/failed keyboard
- Inspect and clean the unibody top case. You will never have a better opportunity to thoroughly inspect, clean, and otherwise attend to any needs or imperfections of this part of your Mac. With my first keyboard replacement, i discovered that the seller didn’t, uh, disclose a past-owner spill:
- Set the working replacement keyboard in place
- Reinstall the zillion small screws attaching the keyboard frame to the top case. Keyboard alignment should be perfect (by design), but might be worth checking the free movement of each key, just in case.
- Reinstall the backlight. I wish i knew what sticky rubbery tending-clear cement Apple used in original manufacture, so that i/we/anyone could track it or something close to it down, for these reinstallations. I substituted white glue on some edges and carefully-applied kapton tape on others, which has at the time of this writing been working for a year and ½ with no issues.
Now it’s time to refer back to whatever take-apart instructions (or your own notes) you originally used for disassembly to reassemble nearly your entire MBP, in reverse order. Then turn on your MBP and test everything: All hardware.
Test every key on the keyboard, as you did initially before installation. Presumably they’re all still good, as is all the rest of the hardware. Enjoy your working keyboard (while it lasts)! And do consider a keyboard cover to keep the crumbs and whatnot out of this one.
iFixIt 161-121-1 Keyboard Repair
Key Cap Removal
This may seem obvious, but after all the pain of installing this keyboard, i didn’t want to risk breaking it if for some reason they were doing something unusual with key cap retention. Here’s the back side of the left Command key and the back side of its hinge:
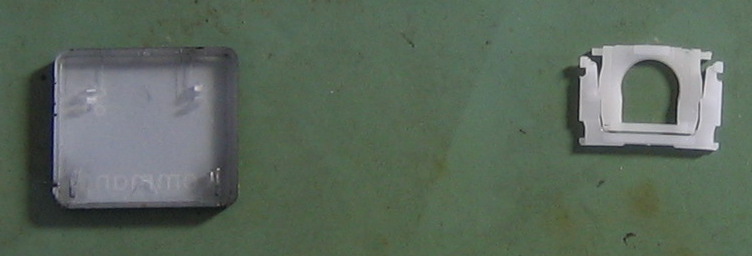
Up above we saw the same key cap backside with the front side of the hinge. Here’s the top-side view underneath the removed key caps:
Looks like the Chinese OEM may be going by the name Pride. Given the marginal quality of their offerings, they may want to consider changing their name to Shame. Better would be addressing the quality issues and actually making a product of which one could rightfully be proud.
In case you’re wondering, yes, the two side contact points operate. This means that if one installed spring cups over these contact areas in the middle of each hinge mechanism, there would now be 3 active sets of contacts. Not sure if this was skipped in production to save money, or if having more than one active contact would be an invitation to excessive key bounce and unwanted multiple spaces.
Key Cap Replacement
Most of the key caps snap straight on, just like most similar-vintage Apple original keyboard key caps. Also as for Apple original keyboards and many others, the special keys with stiffening/balance?/reinforcement metal wires need special care. The only one i’ve had off so far is the space bar, so i’ll describe replacing that one. Sorry, no pictures: i couldn’t figure out a way to get any viewable photos in such tight quarters. Turn up your mental visualizer full-on.
- Ensure that the stiffening wires are properly in place in the space bar cap
- Carefully lower the space bar key cap in its normal orientation
- Once the stiffening wire ends are close enough, insert each of the 4 ends into the matching metal tab hole at each end of the bar (2 per end)
- When certain that all 4 metal wire ends are in their respective holes, continue lowering the space bar straight down until it snaps fully onto both hinge mechanisms
- Test carefully: press on the center then near each end. The space bar should work mechanically and electrically in all those locations.
Space Bar Key Cap Repair
If it was easy to replace the keyboard, there’d be no point: just get another from iFixIt, under their lifetime warranty. Thanks to Apple’s design, it’s anything but easy to change out the keyboard, making many otherwise tedious repairs compelling.
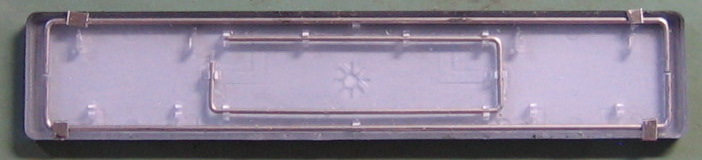
The failure i’ve seen here is that the plastic retainer points molded into the space bar key cap fail to retain the stiffening wires over time—one or both wires fall out, and the space bar only works near its center point. If only there was a way to ensure the wire(s) stay(s) in place, then if the rest of the keyboard was still OK (as mine basically was), one could fix the space bar key cap and reinstall it, sparing the risk and agony of wholly disassembling the MBP again.
I made an attempt to hold the wires in place with very thin small strips of metal, cut from an old 3.5" hard-cased floppy disk shutter:
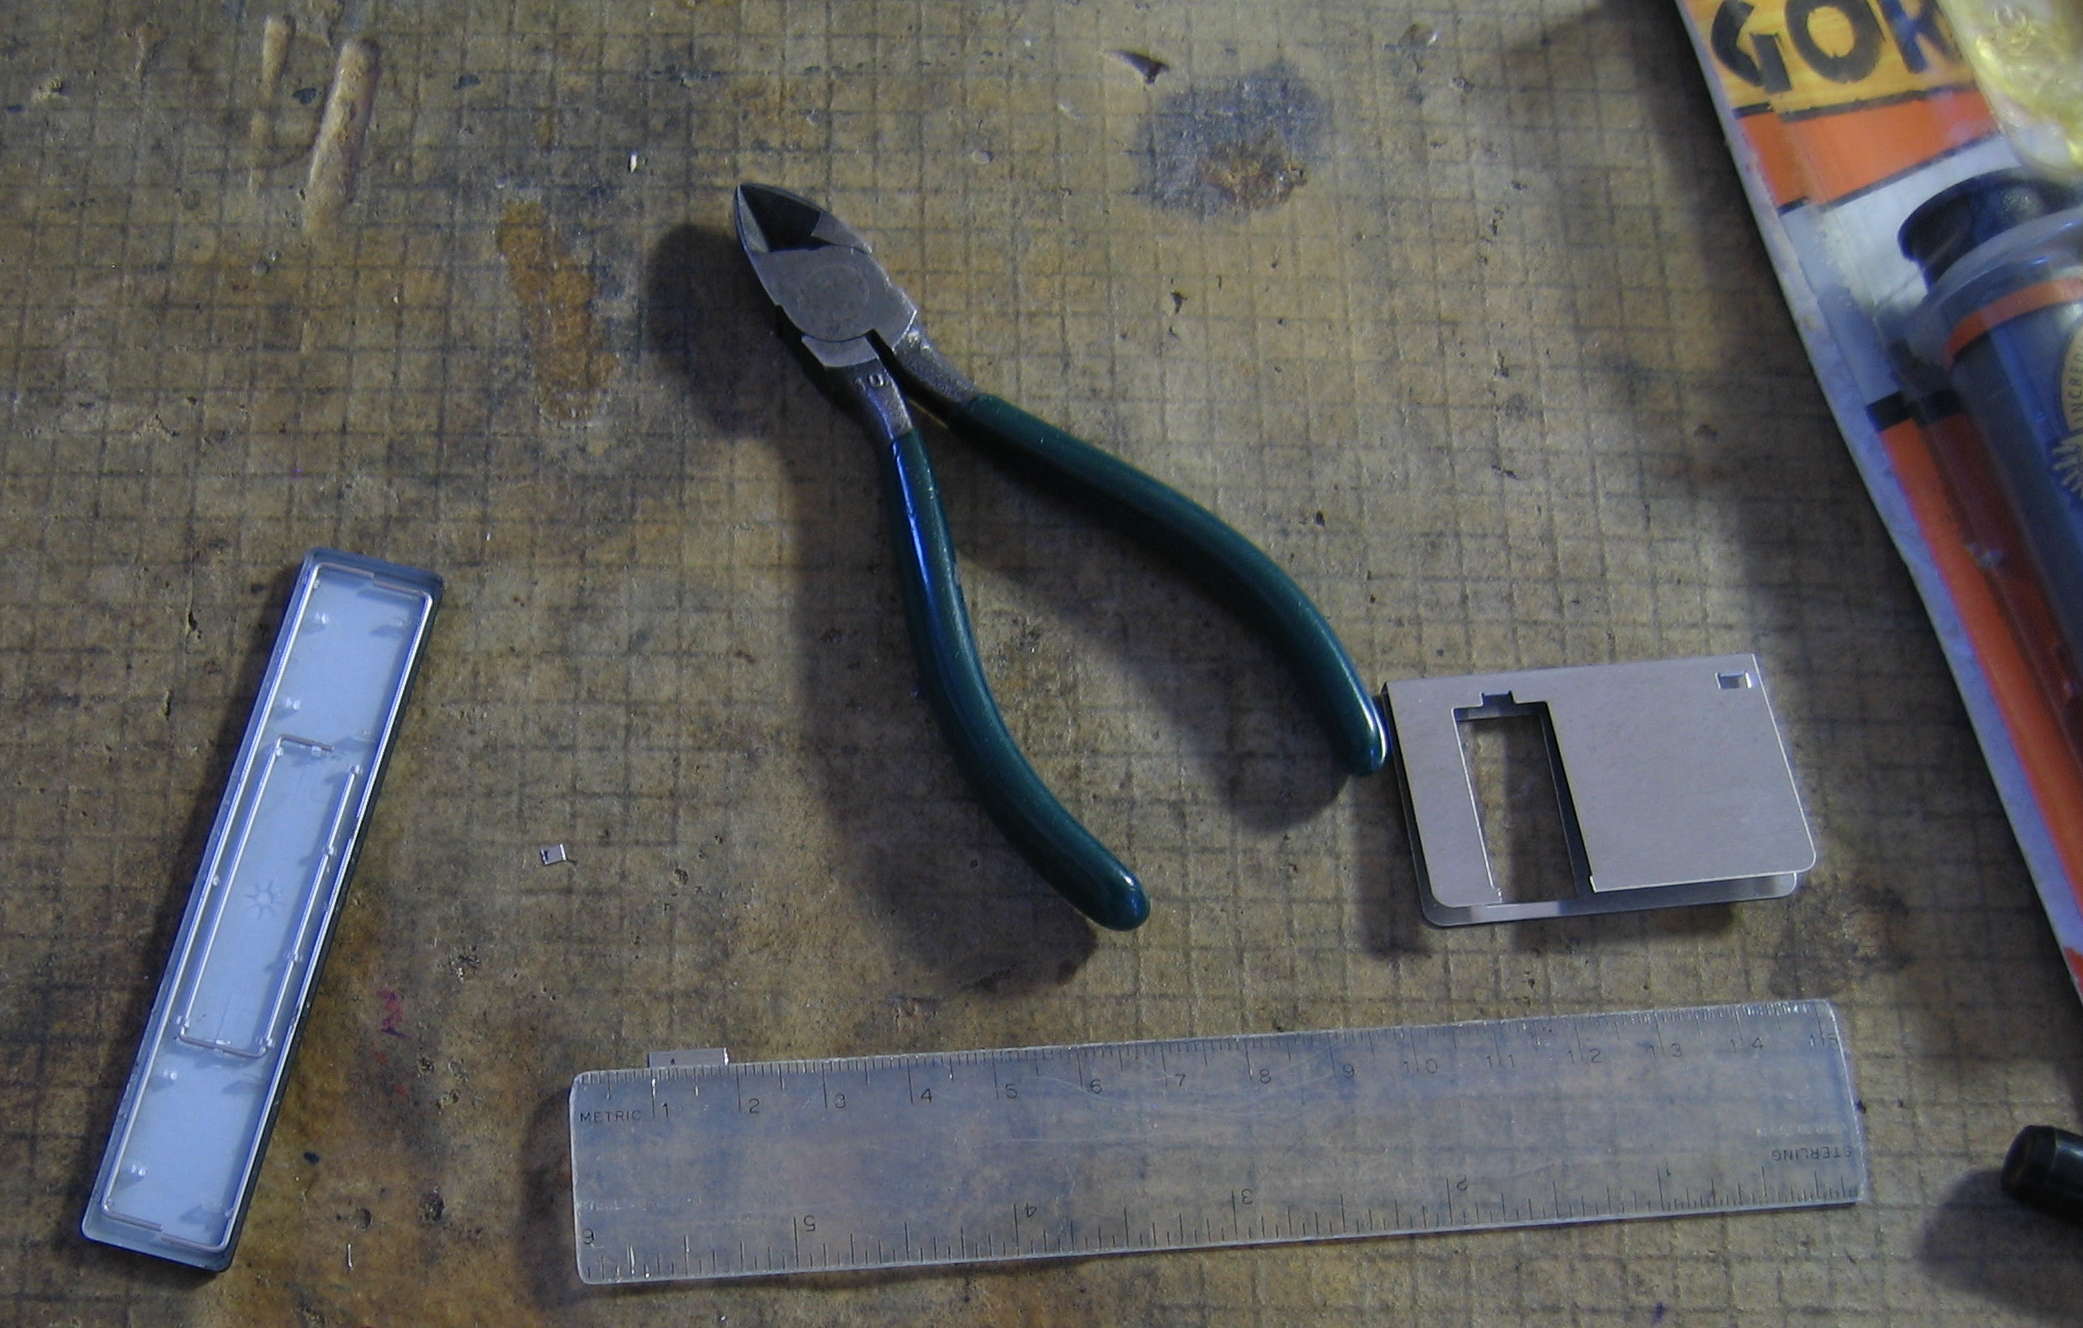
I’m presenting the above picture at high resolution in case it’s useful to zoom in and take a closer look. I put tiny dots of 5 min. epoxy on each side of the existing wire retainer plastic on the key cap, then carefully placed each metal piece atop:
Unfortunately, somehow i didn’t mix the epoxy correctly: it never set. Due to time constraints and my Mid-2012 MBP being my primary computer, i needed to abandon this repair attempt and use one of the new unused space bar key caps from one of my other defective iFixIt keyboards. The theory seems sound, even if my execution was lacking.
What Else?
That’s all i have. If anyone figures out a reasonable way to repair partially-operational keys on these keyboards, please contact me so hopefully that information can be included (or linked-to from) here. You’re likely to have many grateful new friends! All i know with the left Command key failure is that with the key cap and hinge removed, the rubbery plastic spring cup needs extra pressure in any direction to actuate the electrical contacts.