Controller in the Garage
History
The original 1927 installation naturally started with manual valves: 4 for the front yard, 4 for the back yard. During the late 1970s or early 1980s irrigation renovation, the systems were converted to electric valves. Two identical electromechanical timers (Lawn Genie model R 406DLG) were installed in the northwest corner of the red patio area, on the trellis. Each timer could control up to 6 zones; only 4 zones per controller were in use.
This basic design 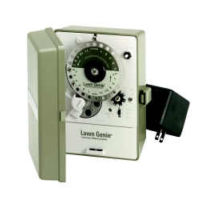 is still available today (in 2007 at least) at home centers and hardware stores. While adequate for turf watering, the 1/2 hour maximum cycle time was far below what is often needed (several hours) for many drip irrigation installations. As a temporary workaround during the transition, i jumpered the unused zones to existing zones to boost the cycle time to at least one hour.
Back in the days when i was still thinking of making my own controller, i had purchased a small electronic irrigation timer at a garage sale for only a few dollars, as an investigation sample. This was also Lawn Genie brand, this time model LC-4.
When the rose beds near the garage were converted to drip irrigation, there was no appropriate valve circuit in the vicinity to serve up the water. So, i added a small brass Champion electric valve onto the hose bib at the southwest (rear) corner of the garage, near the older Meyer lemon tree. Being far too far away from the existing two controllers in the pre-renovation period, it was necessary to hook up the LC-4 in the garage for the sole purpose of running that one valve.
At this point, pre-Extreme Irrigation renovation, there were three separate irrigation timers needing to be checked now and then and all needing to be reset with seasonal time changes. Even several years after the new pipes and conduit were laid, we were still waiting on an appropriate controller to control everything, and hopefully in a more water-wise manner!
Shopping and Purchase
There is no shortage of irrigation controllers out there, from low-end home timer devices such as described above to multi-thousand-U.S. dollar systems for large, usually public, grounds which have both extensive weather sensing (or weather data history access) and thorough, secure networked remote control abilities.
We knew that, if at all possible in terms of budget, we wanted a weather-sensing controller, not a simple timer. Barring that, we would at least install a rain cutoff to automatically block irrigation system watering during times of precipitation.
The selection at Home De(s)pot and our other local hardware/home center options was not promising: the most interesting item was a timer with an R.F. remote control to ease system adjustment. Research online revealed that the starting price for the lower end of irrigation controllers with any actual weather sensing was well over $500—in spring 2005, when we were in the market. This part of the system renovation was actually stalled for several months, as research continued.
Auspiciously, circa May 2005, our local water department (Pasadena Water & Power) enclosed a list of irrigation controllers eligible for a rebate, some of which were weather-sensing, or in the more commonly-used parlance, controllers cognizant of evapotranspiration (ET), usually referred to as a class as ET Controllers or “Smart” controllers. There were one or two which had escaped my research, including the one we wound up buying: the Accurate WeatherSet WSR 12 (or WS 12R) ET controller.
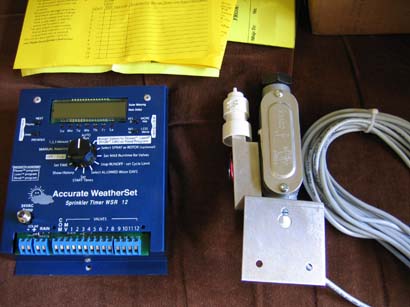 As of spring 2005, the Accurate WeatherSet WSR series set the low end of the ET controller market. Our WSR 12 cost US$176 including tax, shipping, and a substantial discount due to arrangements between Accurate WeatherSet and our water department. The next closest choice was several hundreds of dollars more, and offered nothing compelling. The next most compelling choice was around US$1000.
Much of the next couple of explanatory paragraphs are adapted from the WeatherSet site. There are several classes of ET controllers, depending upon how the weather adjustment data which alters the irrigation cycles is obtained. Classes include:
- Use of historical ET data, typically programmed into the controller
- Subscribed private broadcasts of current ET data from a central location to each controller
- Use of on-site sensors to measure climate data and calculate ET
Historical ET
…Can be better than nothing (a standard timer with no cycle alterations), yet can be waaaay off for unpredictable weather, as some claim is becoming more common.
Broadcast “real time” ET
First, there is the economic issue of paying yet another monthly subscription fee. Second, your controller becomes much less useful if the signal fails, or, worse, if the company supplying the signal goes belly-up. Finally, ever heard of microclimates? The “real time” ET, while local to a region, may not track very well with what is happening in your yard.
One big upside: By sharing the weather equipment, this equipment can be much more extensive and high-end than would otherwise be cost effective for individual units. Still, to me, not enough to outweigh the downsides.
On-Site Weather Sensing
Cost and accuracy can be significant problems with these. Yet, the data is real-time, specific to the microclimate of the premises being served, and no additional cost once purchased and installed.
Accurate WeatherSet takes a “close enough” approach by only measuring solar radiation and detecting rainfall. According to them, the California Department of Water Resources indicates that solar radiation constitutes 85% of fully accurate ET information on windy days, and 90-95% on calm days. Between measuring solar radiation and shutting off during rainfall, the Accurate WeatherSet products are able to track actual, fully accurate ET quite acceptably, and far better than anything else in their price category (at least as of spring 2005).
The New Controller Installed
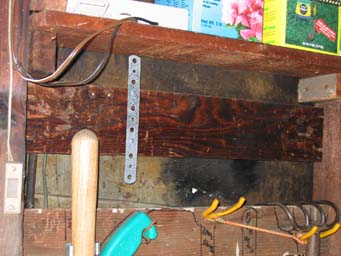
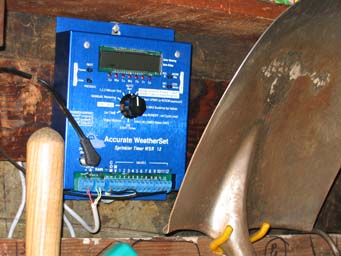
As of late spring 2005, the new ET controller replaced the independent controller to at first only control the same rose drip system which the LC-4 had previously controlled, via the valve just outside the garage. Once proper cabling was obtained in early summer, two 7-conductor 18 ga. 30V irrigation cables were run in parallel. Because the color codes of the cable wires are identical, one cable is marked at each of its several ends with blue electrical tape. Wires in this cable are noted as [wire color]/blue in these pages and other documentation.
The two cables “free run” inside the garage, held by staples, until they enter the pictured junction box from the rear, and terminate in either terminal strip screws or wire nuts. All except the one (white/blue) wire for Valve 12 (this valve, the rose drip system) continue onwards into the underground conduit run which exits the bottom of the box.
