
The rain and solar radiation sensors for the Accurate WeatherSet controller require an unobstructed view of the sun for as much of the day as possible, and nothing above, like tree branches, to drop extra water and throw off the rain sensor. Fortunately, there was such a location, and quite nearby the controller: on the roof of the garage.
It will now become painfully clear that i do not know the proper architectural terms. Our garage roof is a sloping flat roof, covered with that gray pebble material with the tar-like backing. Around the periphery is a raised “lip” of about 1 foot or so. The top edge of this “lip” is just wide enough to allow one row of roofing tiles to encircle the roof for protection and (one assumes) appearance.
By installing the highest sensor flush with the tile tops, it was possible to allow for a full amount of sun exposure while still making it impossible to even see the sensors from the ground… very nice! While there were any number of places fitting this criterion on the garage roof, it made sense to keep the sensor on a plane with the controller inside the garage to keep the wiring run short and sane. This put the sensor right along the outer tile edge, nicely out of the way.

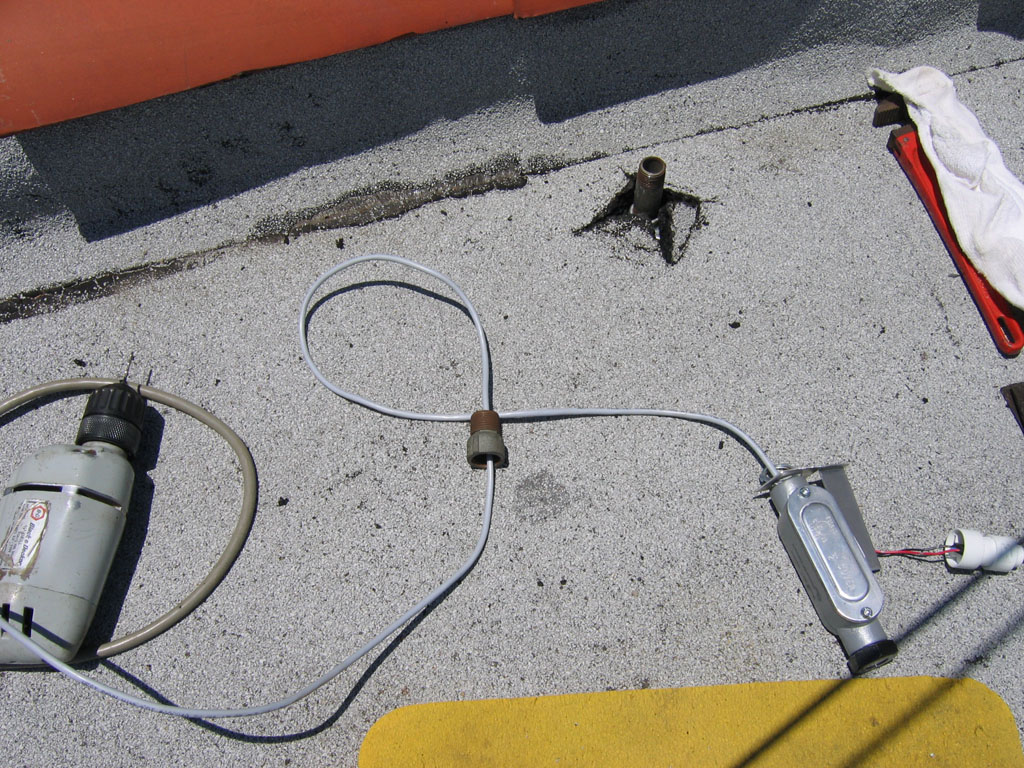 The sensors ship on a convenient mounting bracket… convenient when one is going to screw the bracket into wood, say near the end of a peak on a peaked roof. Not so convenient for what i had in mind! Fortunately again, the sun sensor is mounted in a standard electrical conduit body, and it was easy to design a conduit-based mounting system. With the addition of some pipe/conduit fittings and the removal of some of the original mounting bracket’s aluminum, everything was ready.
Since i was cutting a hole in the garage roof, it was helpful to have had the practice of successfully installing a skylight on that same roof several years earlier—especially as there had been no leakage problems from the skylight installation.
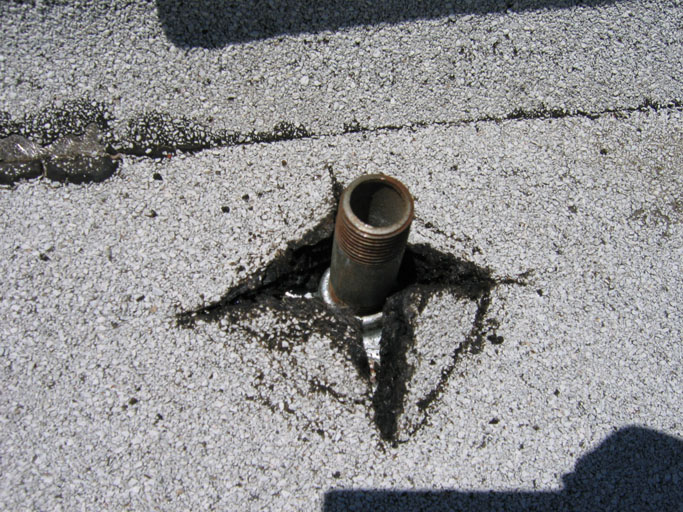 The roofing pebble paper needed to be cut back as little as possible to allow bolting the floor flange directly to the rafter wood. Surprisingly, this results in much less of a leakage problem than just ramming screws through everything into the wood!—so says the roofer, and it seems to have worked on the skylight. Naturally, a small hole for the cable needed to be drilled at the center of where the pipe bottom is located.
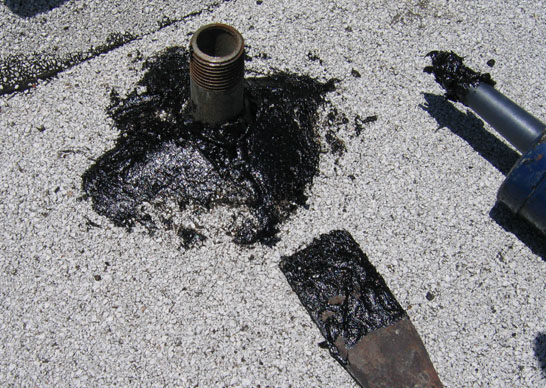 With the pipe in place and securely tightened, it was time to apply generous amounts of plastic-based roof patch caulking compound all around between the bottom of the roofing material and the wood understructure. This space, and everything just installed there, was slathered with compound. The 4 flaps of roofing material were then pressed down, and more patch compound spread around the top surfaces, sealing all cracks and openings all the way to the protruding pipe.
That’s not enough though, according to our roofing guy and other resources: some metal flashing is needed. I cut a hole in a piece of square-ish/rectangular galvanized sheet metal, slipped it over the pipe, and pressed it well into the caulk. Naturally, another thick slathering of roof patch caulking compound was added atop the flashing and connecting with all joints. Now it should be waterproof!

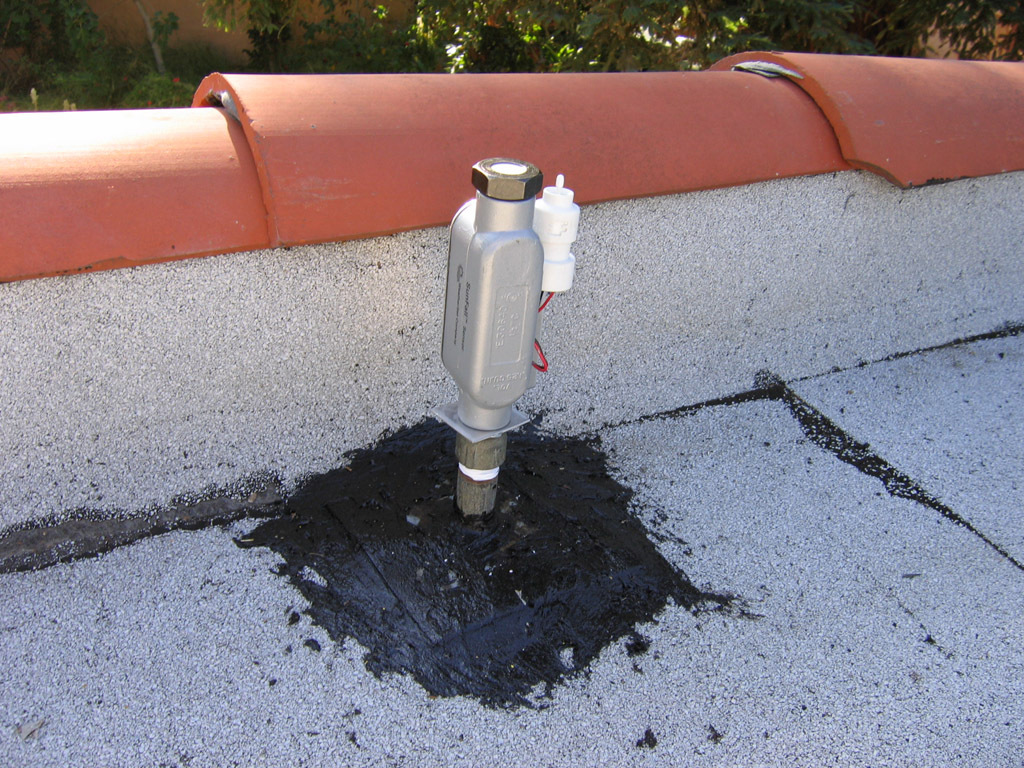 Once the roof patch had had a day or so to set and dry out, it was time for final assembly. Some Teflon® pipe thread tape was applied, the cable run down the center, and the sensor assembly screwed tightly into place. Then it was only a matter of stapling the sensor cable along its path from the pipe to the controller, and hooking it up.
The overview photo on the left is meant to give some sense of scale and relative location of the sensor vs. the garage roof and a patch of the backyard lawn. The roof surface visible in the photo is approx. 1/8th. or less of the entire garage roof surface. The sensor is located roughly center-west on the roof.
In the closeup photo to the right, the solar radiation (SunFall™) sensor is the white plastic part in the center of the nut at the top of the conduit body. The rain shutoff sensor is the white plastic item off to the right side with the red and black wires exiting it from the bottom. This rain shutoff sensor, and others like it, are available separately from various sources, and can be included in nearly any electrically-controlled irrigation system.
 World O’ Appliances/Household/Plumbing/Irrigation/HVAC/Hardware
![]() The Sonically Pure Pages
The Sonically Pure Pages
This Siber-Sonically Pure Page is ![]() and
and ![]() Transitional compliant.
Transitional compliant.