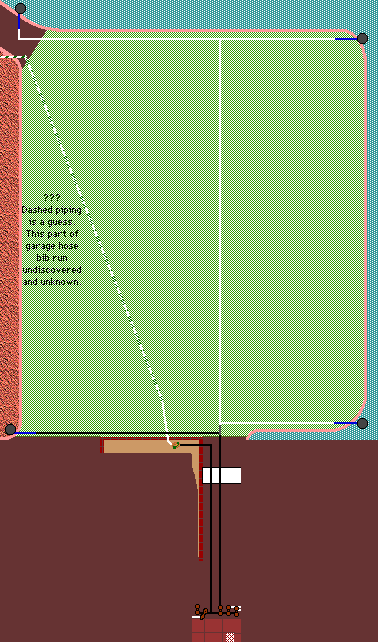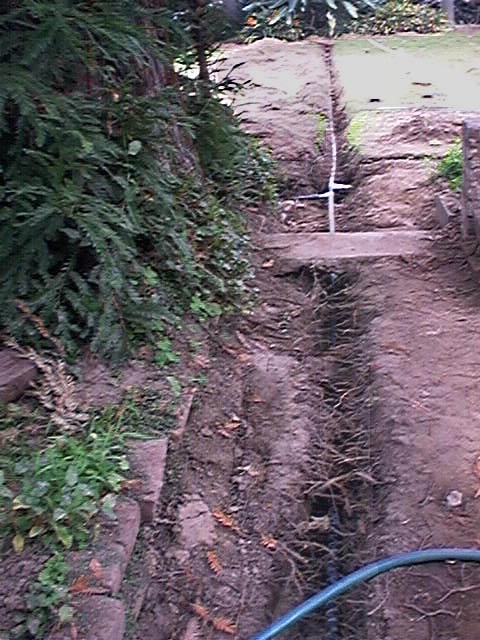


Because of the ability of the redwood roots to crush nearly anything, wrapped galvanized 3/4" pipe is used near the tree, with standard white PVC in the lawn, a safe distance away.
The view is looking from the valve area into the lawn area. It is easier to see the layout in the drawing than in the photograph above. Below are photos and descriptions of each sprinkler head area/feed line and many of the tees and similar joints. Click on any photo to see an enlarged view, if available. Most measurements are pipe depths below soil surface, unless indicated otherwise.
This (above or left) view is from the back lawn, close to the brick wall, facing east. The wrapped galvanized pipe going to the left in the picture is the feed from the valve. The similar pipe going up in the picture off of the galvanized tee is the northeast sprinkler head line. The PVC tee and the PVC pipe heading to the bottom of the picture is the northwest sprinkler head line. The PVC pipe exiting the picture at the right is the feed line for the south sprinkler heads. Note that this latter line runs fairly close to the old installation’s center row, but far enough to the east to require its own trench in most areas.
This (below or right) is the view on the other side of the trench, facing west, looking back at the camera position of the photo above. Here can be seen the line for the northwest corner sprinkler head.
This (above or left) is a segment of the northeast sprinkler head line, going to the corner of the rose bushes near the driveway gate. The installed head resides at the very leftmost trenched point in this photo. Instead of a larger image, clicking this picture will show the depth of the pipe.
Although the dirt makes it difficult to tell, this (below or right) is the center south edge of the lawn, facing south. The scalloped edging is normally where the pipes are, or just behind (above, in the photo). The tee splits the incoming (photo bottom) line to supply the southeast (photo left) and southwest (photo right) sprinkler heads.
The photo with the big leaves at the left is the southwest sprinkler line running off the south tee (facing west). The photo with the brown leaves atop the pipe/in the trench is a detail of the termination of the line, representative of all four sprinkler head terminations. The PVC ends and transitions to the blue, highly flexible “funny pipe”, which attaches to the sprinkler head (represented here by a group of green avocado leaves). The “funny pipe” allows precise adjustment of height and angle in the final installation without stressing the PVC pipe.
The photo with the big leaves at the right is the southeast sprinkler line, coming off the tee (photo facing east). At the very top of this picture, the line turns south (to keep it in the avocado tree area, and out of the lawn area), which is pictured in the photo above or left. The “funny pipe” in this case sports a white PVC cap to keep dirt out during installation. It approximates the final sprinkler head position, just behind the correctly-installed scalloped border.